Powered by Blogger.
Showing posts with label Thinking of You. Show all posts

Love from Lizi Thinking of You Shaker


Happy Valentine's Day! I'm so excited to share this sunny shaker card I made with the February Love from Lizi Card Kit. I wanted to give the beautiful ephemera pieces a little extra flair, so I decided to turn it into a shaker card!

For this card, I went with a bright and cheerful color scheme using the sunny yellow and navy cardstock from the kit. I just love that butter yellow – it reminds me of sunshine! To add some texture, I used the Dotty Stencil from the kit and applied clear texture paste to the yellow cardstock. While that dried, I got to work on the shaker element.

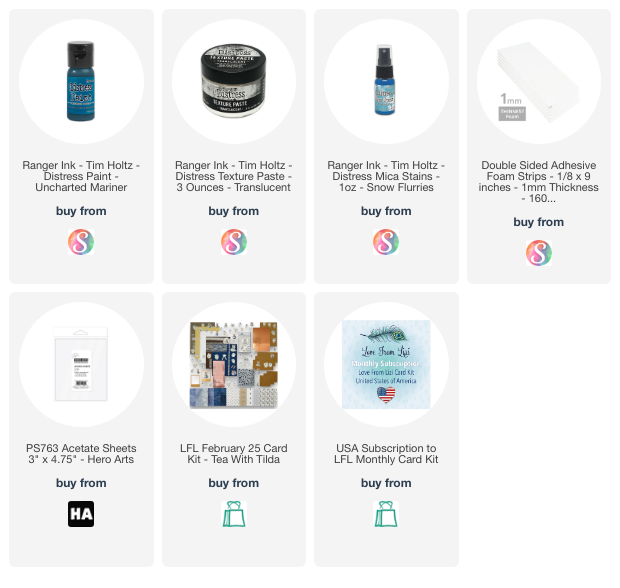
I was really drawn to the mirrored polaroid frame included in the kit, so I decided to give it a makeover to match my colors. I painted the whole frame with Uncharted Mariner Distress Paint and then sprayed it with some mica spray for a touch of shimmer and texture. I love how it turned out!

For the shaker, I glued one of the floral ephemera pieces just below the acetate window and another on the outside of the frame. I filled the shaker with a mix of clear rhinestones from the kit, flatback pearls, sequins, and beads. To make sure there were always some sparkles showing, I glued a few of the shaker bits down to the yellow cardstock and let the rest flow freely.

To finish the card, I typed a sentiment on my typewriter, cut it into a banner shape, and adhered it to a scrap of yellow cardstock. I love how this card turned out – it's so bright and cheerful!

Thanks so much for stopping by today! I hope you have a fabulous day!

Garden Party


Hi friends! It's time for the monthly Sweet 'n Sassy Stamps Inspiration Hop over on Instagram. This month our theme is Garden Party and I chose to feature the Beautiful Bouquets stamp set.


I pulled my colors for these cards from a paper pad I recently purchased, and colored the images with Copic markers. This set has coordinating dies which make for no fuss cutting.  I cut circles using the Circle Dies, then chose the thinking of you sentiment from the set to emboss my papers. I added a little swiss dot pattern behind the sentiment on the first card using the Texture Tiles 8 stamp set.  For the second card, I used a scallop border from the Bookmarks & More Die set as a mat for the sentiment strip.


Thanks so much for stopping by today! If you have a chance, be sure to head on over to my post on  Instagram for the hop and a chance to win a $25 prize code to the shop.


Dots and Butterflies


Hi friends! Today I'm popping in with a couple of cards I created with the Not 2 Shabby February Stamp of the Month, Spread Your Wings. It's absolutely gorgeous.  I subscribe to the stamp only option, but often don't find time to play with it until the end of the month.  It's only available through today, so if you want it, go and snag one, as there will be a new stamp of the month on March 1.


I chose a blue and green palette to color the butterfly and floral images from the set with Copic markers. Since I didn't get the matching die set, I used my Scan 'n Cut to cut the images out, except for the floral image because my machine didn't want to recognize it. Good old manual fussy cutting for that one. 


I paired the images with papers from the beautiful Dots for Winter Paper Pad, then added a little dimension to the images.  The thinking of you sentiment comes from the limited edition Abstract Botanicals set.  I finished off with a few pearls and some white gel pen accents.

Thanks so much for stopping by today! I hope you have a fabulous finish to February!

Satin Pearl Elegance

Hi crafty friends! Today I’m popping in with a couple of cards featuring the new Foliage Silhouettes set from Sweet ‘n Sassy Stamps.


I started off by loading up my MISTI with enough of the stamps from Foliage Silhouettes to stamp a whole card panel at once.  I then embossed both a soft sky and a white card panel with satin pearl embossing powder.  I then stamped and embossed a few extra foliage cuts. There is a fabulous Foliage Silhouettes Die set available, but since I don't have it at the moment, I used my Brother Scan 'n Cut to cut the greenery. 


Next I pulled out one of my go to sets, the Decorative Frames stamp set and embossed the frame, then cut with the coordinating Decorative Frames Die Set. For the soft sky card I chose a sentiment from Forever Loved, then added some rhinestones and ribbon for embellishment.


For the white card, I chose a sentiment from Special Blooms, then added a bunch of dimension with foam tape.  I rarely remember to use any embossing powders but white or clear, but I love the elegance the satin pearl gave to these two cards.

Thanks so much for stopping by today!

Joy Fold Poppies

Hi friends! I’m back again with another card I made for one of the Dare to Get Dirty Challenges on Splitcoaststampers last month. This was actually inspired by two different challenges, one to make a fun fold card, one to use poppies on your card.


I started out with a couple of images from the Precious Poppies set from Sweet ‘n Sassy Stamps. I colored with Copic markers, then cut with the coordinating die set, and accented with a black glaze pen.


I love the classy look of black, white, and red, so pulled out some black and white striped paper and worked on decorating my joy fold pieces. I placed the large poppy on dimensionals, so I could tuck the sentiment flap in behind it as a closure. The sentiment is from the Happiness Blooms set, and I finished with a few sparkly enamel dots.

Thanks so much for stopping by today!

Mojo Monday 514

Hi friends! It's time again for another Mojo Monday sketch! Are you ready to play? I hope so!

As always, you're free to play along with any papercrafting products your heart desires. Use the sketch as inspiration for your creation, then come link it up below so I can come take a look! The linky for this challenge will close on May 5, 2019. I have included dimensions on the graphic later in this post, but feel free to change them up to suit your needs.


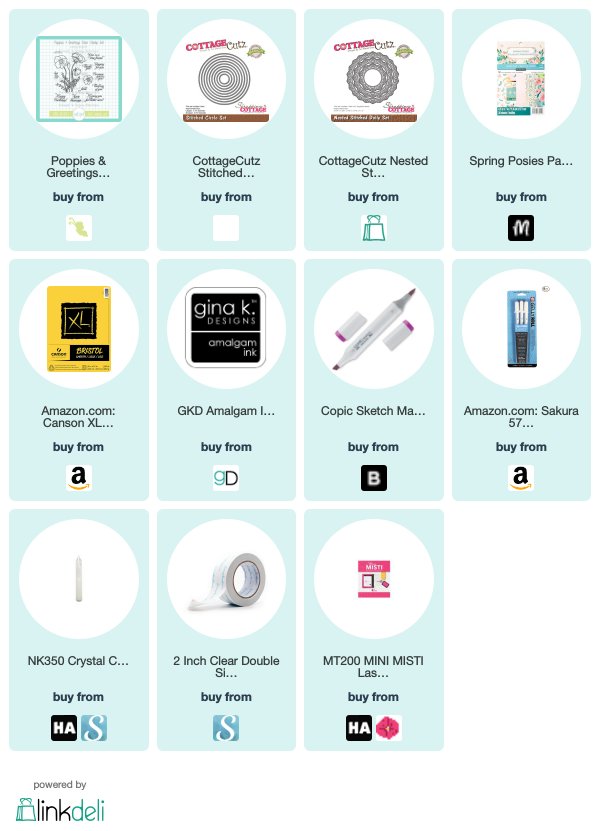
My card today uses a fun set from Sweet 'n Sassy Stamps! I started by stamping the poppy image from Poppies & Greetings onto a die cut circle, leaving enough room to add a sentiment at the top.  I colored the flowers with Copic markers, then added a bit more white back in with a white gel pen, and finished with a coat of clear wink of stella marker and a bit of crystal clear accents on the flower centers. This circle is matted onto another die cut circle from black cardstock.


I then set this aside, to build up the layers on my card. I picked a pad of paper I bought recently with a 60% off coupon and selected a few patterns that coordinated with the colors I had used on the image. I matted two thin strips with white cardstock, then used washi tape as a horizontal divider on a 4 x 5.25" panel of patterned paper.


To finish things off, I layered it all onto an A2 sized card base.  If you love this stamp set, now's the time to pick it up. Sweet 'n Sassy is having a free shipping promo through the end of the month. Use code SP19SHIP for FREE US shipping on a $20 order at Sweet 'n Sassy Stamps through April 30! 


Okay, now it's your turn! I can't wait to see what you create!


You are invited to the Mojo Monday challenge!
Click here to enter

Thanks for stopping by! I hope you have a super creative start to your week!

Compensated affiliate links are used where possible. When you place an order after clicking one of my links, I receive a small commission at no additional cost to you. Thanks so much for using my links and supporting this blog. 💙

Thinking About You a Latte

Hi friends! Did y'all have a good weekend? I got to spend a bit of crafty time to myself on Saturday while the boys went to a local college basketball game. I didn't get as much as I thought I'd get done, but I sure had a lot of fun, AND enjoyed the silence! {grin}


Today I'm sharing a fun little coffee card using the All My Love DIGITAL Set and some Be Mine papers from Echo Park. I had fun with patterns and layout, adding a die cut scalloped border.  The sentiment and cup are from the PDF version of the digi, printed on my laser printer. I fussy cut the cup and colored with Copics, then die cut the sentiment and matted with a scalloped circle die cut.

My finishing touch was a bit of baker's twine, accented with a trio of mini roses. Super fun and the perfect pick me up for a friend!


Thanks so much for stopping by today! I hope you have a super awesome start to your week.

Enabler's List
Stamps: All My Love DIGITAL Set (Verve)
Paper: Be Mine (Echo Park), basic black (SU!), cream (Neenah)
Ink: laser printer, copic markers
Accessories: Stitched circles die set (Cottage Cutz), scalloped circles nestabilities (Spellbinders), border die (MFT), baker's twine (Divine Twine), flowers (Recollections)

I Thought of You

Hi Friends! Happy Thursday! Today I'm popping in with another card I made a while back, but never shared. This one I made for a guest designer spot I was doing, but at the time I thought it wasn't "fancy" enough, so made a different card for the post and this card got forgotten.


The leafy background image is from New Mercies (30% during this week's sale) is stamped in Pear Pizzazz, and then I over-stamped the two sizes of flowers from the same set, then stamped the flowers again onto designer paper and pieced them over the stamped stems.  The sentiment is from Small Phrases (also 30% off) and is stamped onto newsprint paper, then punched out with a circle punch and layered onto a petite scallop circle.  I used a little border punch along the bottom panel, and highlighted with liquid pearls.  A little distressing, a black bow and some rhinestones from Pizzazz Aplenty finished it off.

Thanks for all your kind comments throughout the year and during my blogging break.  Mark and I are enjoying putting everything in its place in our new home.  So far our holiday break has been exhausting and very emotional.  I'm having a tough time processing all the change that's coming our way in 2012 and am so very sad to see this childless chapter in my life coming to an end.  And so very guilty to have these feelings when so many friends and family are struggling so hard to have a baby.  I'm sure the pregnancy hormones are magnifying this whirlwind of emotions, but please say a little prayer of peace and comfort for me if you think about it.

Enabler's List:
Stamps: New Mercies, Small Phrases (Verve Stamps)
Paper: designer paper (SU!), Black, Cream
Ink: Pear Pizzazz, Black, Antique Linen
Accessories:  border & circle punch, triple punch pack (SU!), ribbon (May Arts), Petite Scallop Circles Nestabilities (Spellbinders), rhinestones (Pizzazz Aplenty), distressing tool

Thinking Vintage

Happy Wednesday!  Today I'm back with another card using one of this month's Viva la Verve! sketches.  This one is from September week 3.  I just love square cards, so I couldn't resist this super cute sketch! 
For the inspiration option, I chose this bedroom ensemble and it immediately made me think of my new Conservatory papers from 7 Gypsies.  So I pulled them out and started in on some shabby chic crafting!  Basically the papers are so pretty, that I didn't really have to do too much.  I sponged the edges with Antique Linen vintage distress ink and matted everything with some crumb cake cardstock.

For the stamped panel, I stamped a 2nd generation (ink up the stamp, stamp it once on scratch paper, then immediately on your paper without reinking) silhouette of the Kind Words flower in Soft Suede, then stamped the sentiment with full strength Soft Suede.

The ruffly bow is made with some scrumptious shabby wrinkled ribbon. I tied a normal bow, then wrapped another piece of the ribbon around the center of the first bow and tied a second bow over the top and adorned with a trinket leaf pin from Maya Road.  The embossing folder is a new one from Sizzix I found at Archiver's this weekend - Swirls #2 and I finished off with a little pierced edge on the green panel and three 4mm peridot rhinestones from Pizzazz Aplenty.

And for those of you who asked yesterday...  When I'm using Nestabilities as a stencil or mask, I keep it from sliding around on my paper by scotch taping the die to my scratch paper on all sides.  If you're sponging, you'll still want to keep pressure down with one hand on at least one edge of the die, so it doesn't wiggle with your sponging, but for masking or outlining it should stay put without much extra effort.  Okay, that's all my chitchat for this morning!  Thanks for stopping by - I hope you have a fabulously creative day!

In the Spotlight: Blessings

Hey everyone! It's time for another New Release Spotlight over on the Verve blog!  The Divas are peeking a new set called Blessings, and there's a chance to win just for telling us what you think, so be sure to hop on over there when you're done here!
The concept for Blessings originally started out as a St. Patrick's Day set, but circumstances kind of collided earlier this year and I wasn't able to get it prepped in time for a St. Patrick's Day release.  So I tabled the set, thinking I'd just wait until next year to release it.  But the more I thought about it, the more I kept coming back to the set, knowing that I wanted some of these blessings year round.  So I sat back down at the drawing board and re-worked it as an all-occasion set, and Blessings was born!  


For my card today, I chose to use one of the flourishes as my focal point, with a simple thinking of you sentiment.  The set has birthday, sypmathy and wedding sentiments too, as well as a few beloved Irish blessings and proverbs.  The sketch for this card is the fourth challenge in Verve's Beach Party Challenges (VSAPRBP4).

I started by embossing the flourish on an oval die cut in black and Broken China.  On the bottom baja breeze panel, I stamped another flourish tone on tone, and then added a sentiment in black.  The dp is from Making Memories and I added some QuicKutz flourishes to set off the little rose in the corner.  When I brought all my new release cards down to show Mark, this was his favorite.  Funny that the girliest of all the cards this week was his favorite, huh?

This set is really quite elegant, but I'm also excited to show you some really cool ways to mix this set with the other more rugged sets we've been previewing.  Of course, time is running short the closer it gets to release, so I'll have to save that for sometime next week.  :)

What's In It?
Stamps: Blessings (Verve)

Paper: Making Memories DP, Black, White, Baja Breeze
Ink: Baja Breeze, VersaMark, Onyx Black
Accessories: Fountain Fun punch (EK Success), Flourish Dies (QuicKutz), mini rose (prima), wrinkled ribbon (May Arts), Classic Ovals Nestabilities (Spellbinders), Stickles, clear embossing powder

Wild Raspberry Round or Square

Hey there, everyone! It's the start of another week!
Monday morning means there's a new Mojo Monday sketch to play with. This one was submitted by Teresa Kline as a round sketch, but I decided to interpret it as round or square, in case anyone doesn't have the supplies for round cards. I really haven't made many round cards, so I was a little nervous when I started my card. However Mr. Mojo smiled upon me and it turned out to be one of my favorite cards ever!


The paper is from the Wild Raspberry collection by K & Company and I designed everything around the beautiful you sentiment in Celebrating You. I added some sweet paper blossoms in the corner, and a Martha Stewart punched butterfly in the bottom corner. The pearl borders are from Michael's, then I finished off with some Gold liquid pearls on each scallop. I had so much fun making this card, that I had to try another with the square version of the sketch and my leftover supplies.


This one uses the Valentine BE MINE sentiment from Heart's Desire, stamped in Baja Breeze. I punched out the little hearts, then stamped them with the little heart cluster from Heart's desire and added a little scallop border to the bottom of the panel. A little vintage lace trim and a red prima rose finish off the card.

I hope you have fun with our round or square challenge this week. It's also the first day of the Project Parade over on the Verve Blog. Head on over there to see what I created to kick off the parade!

Flowers in Distress

Hey everyone! TGIF! Today I have a card to share using the Viva la Verve January Week 4 At Home with Verve sketch & inspiration challenge. Wowee! Now there's a mouthful! Anyhow, I've been hyping the challenges all month and can you believe this is the first time I've gotten to play along? Check out the Viva la Verve! area in our forum later this morning for Amber's sketch and the other inspiration photos for the week.

As soon as I saw the inspiration photos for this week, I knew exactly which one I would use. I have candle holders in these exact colors in my front room, and I was totally loving the distressed darker edges of the flowers and wanted to see if I could re-create it with Copics and ink.

So I pulled out Love's Flower (big surprise - I'm having a hard time giving equal playing time to my stamps this month!) and set to work stamping the large flower 3 times, then coloring with Copic markers and cutting out. Next I shaded the edges of each flower with Riding Hood Red, So Saffron and Bermuda Bay ink and then attempted to achieve the darker edges by sponging on some Vintage Photo Distress ink. Each center is accented with Stickles in a matching color, then I set them aside to dry. To go with the distressed look, I chose Kraft as my neutral and sponged an oval with Vintage Phot then matted on a Riding Hood Red scallop oval, accented with gold liquid pearls.

Next up, I created the caribbean and saffron panels by stamping my own background with one of the square pendants from Accent Notes. I thought the little "feet" of the coat hangers in the photo kind of looked like the little triangle thingy from Accent Notes, so I stamped that in between each square to fill out the pattern, then inked with the same color ink and some Vintage Photo. The kraft panel is debossed with the Textile embossing folder and Vintage Photo, then I finished off with a red sentiment from Accent Notes, some liquid pearls and a bow.

That's it for me today. Hope y'all have a fabulous weekend!

Fabulous Wanderlust

Hi everyone! Happy Wednesday! I hope your week is going great so far. I've been busily packing orders, but thought I'd pop in to share another card I made for our recent release. This card uses the Love's Flower set and I paired it with digi papers from the Wanderlust Paper Pack by Quirky Twerp.


{Personal side note: At the beginning of this year, I made the very hard decision to step down from all my non-Verve design work. I adore The Cat's Pajamas, the digichick and Kelleigh Ratzlaff Designs and will continue to use their products (and you should try them if you haven't ... the women behind these fabulous businesses are top-notch people with integrity and heart), but I was finding the need to simplify my "have-to's" so I could make time for more "get-to" stamping. You know what I mean?}

Anyhow, as soon as I saw the color palette in these digi papers, I just had to purchase and download them to paper piece the large flower in the new Love's Flower set. It's also a fabulous palette for shabby chic creations, a style I totally admire and hope to get a little better at! Practice makes perfect, right? :)

Okay, on with the card. I stamped the flower four times. Once on white cardstock, twice on the coral colored paper and once on the green paper. Then I just cut out, sponged the outer edges with old olive and cameo coral ink (this gives a lot of dimension without a lot of effort), then layered on the white cardstock image with dimensionals. I finished off the focal piece with a button center tied with linen thread.

The rest of the layers are all cut from the digi papers and I used the Floral Lace Martha Stewart punch. This is the third card I used it on, and it now will not work. I've tried all the little waxed paper and aluminum foil tricks. It's not stuck, it just won't press down to punch the cardstock. GRRRR! The MS punches have the cutest designs but are made with such poor workmanship. This is the fourth punch I've had this happen on. I've been repurchasing the punches because I love the designs, but no more! Hear that, Martha? LOL

Anyhow, for embellishment I added a little vintage lace trim, along with some pearls from Michael's. Then I finished off with a button tag embellishment, stamped with the fabulous {just the way you are} sentiment from Love's Flower.

Okay, back to the grind. Have a fantastic day!

My Toys:
Stamps: Love's Flower (Verve Stamps)
Paper: Wanderlust Paper Pack (Quirky Twerp)
Ink: Black, Coral, Soft Sky, Old Olive
Accessories: Floral lace punch (Martha Stewart), vintage lace trim, buttons, linen thread, Nestabilities tag die, mini pearls, dimensional foam, Stardust Stickles

Just a Note

It's Monday again already! And that means it's time for another Mojo Monday sketch. This week the fabulous Mary Fish stepped in for me with a gorgeous little sketch, so that I could keep working on shipping orders. I did take a little break to take the sketch for a little test drive and I love how it turned out.


I wanted to use the new Accent Notes set because I'm just in love with it right now. I stamped the square pendant in the center of the oval in Old Olive, then stamped the swooshes twice in Rose Red. I colored the center in with a Copic marker then stamped and colored the square one more time, stamped the tiny flower from Love's Flower in the center and punched out with a 1/2" circle punch to pop up in the center. I sponged a little pink pirouette around the edges and then started in on my other layers.

Both the rose red and the pink pirouette panel are stamped with the same square pendant and tiny flower in rose red. I added some old olive mats and then embossed the just a note sentiment from Accent Notes in white over on the side. I finished off with some liquid pearls, some tiny pink pearls, a ribbon and some little paper flowers covered in Stickles.

That's all for now, folks! Have a fabulous Monday!

Sage Accents

Hooray for Wednesday! Today the Divas are peeking a new set called Accent Notes over on the Verve blog, and it's in the same vein as the Thankful Accents set we released in November. You'll see some familiar elements, along with some great background builders, another fun circular frame and a few sweet sentiments.

Although I'm a huge COLLECTOR of patterned paper, my first love is creating my own DP with stamps, and I've been finding myself getting back to classic cardmaking lately with just stamps, cardstock, ink and a few beloved embellishments. So I started my card with a sage shadow panel and stamped one of the square pendants from Accent Notes in Sage Shadow all across the panel. Next I pulled out the flower from another set releasing later this week (Love's Flower) and stamped it in chocolate chip in the spaces between each pendant. Once that was finished, I sponged with chocolate chip ink, rounded two corners and matted with chocolate chip.

I thought this printed ribbon I got from Michael's went really well with the motif, so I tied it around the panels and then got to work on my stamped panel. {Okay, so it looks like my bow is having a bad hair day. It's like those driver's license pictures where you swear you're looking good and then they click the button and you're stuck with a Medusa mug shot for another 4 years!} LOL Anyhow, I stamped the circular frame in chocolate chip, then colored with a sage shadow marker and added some chocolate pearls for accent. The thinking of you sentiment is stamped in the center and then I layered on petite scallop circles in sage shadow and chocolate chip. To finish off, I tucked a little Making Memories Shimmer Chipboard Flourish under my circles to qualify for Michelle's Release Week challenge to use chipboard on a project.