Powered by Blogger.
Showing posts with label Halloween. Show all posts

Eat If You Dare Halloween Pockets

Hi friends! Happy Halloween. Today I’m sharing the envelope treat pockets I created for my boys this year. They both love the Hershey’s Special Dark XL bars, so I wanted to make something to gift one in.


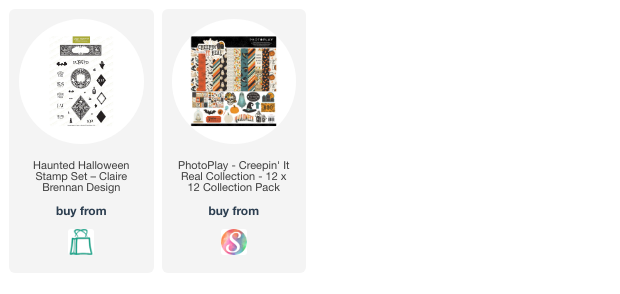
I started with some slimline envelopes I had in my stash. I sealed them up, then cut at around 6.25 inches. I then cut papers to decorate the two pockets. I used a circle punch to make a thumb notch in both pockets, then glued the smaller pocket to the larger pocket. The eat if you dare sentiment on the first one is from Claire Brennan’s (formerly Waltzingmouse) Haunted Halloween stamp set.


 I finished decorating with stickers and cut outs from the Photoplay Creepin’ It Real collection I used for the papers. I tucked the XL bars in the large pocket, then added a couple lollipops to the front pocket.


The boys were super excited to find these on their placemats when they got up this morning. Thanks so much for stopping by today. I hope you have a fab-boo-lous Halloween.

Spooktacular Friend


Hi friends! Today I'm popping in to change up the scenery from all the Christmas going on lately. That's probably one of my least favorite part about designing for the craft industry is creating holiday cards out of season. Every once in a while I have to just take a break from team assignments and pop in something seasonally appropriate! {grin} My boys have decided not to dress up this year and just stay home and watch a family movie and pass out candy. Kind of a little sad, since they've so enjoyed trick or treating every single year to this point.


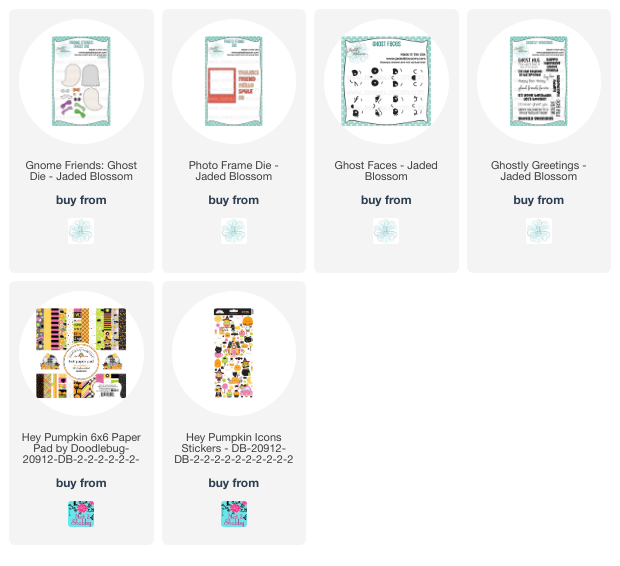
When I saw these cute ghosties from Jaded Blossom I just had to have them. I envisioned having a lot more time to create for Halloween, but at least I'm squeezing in a card with them before the holiday has passed!

I had fun dressing up the Gnome Friends: Ghost Dies in colors to match the Doodlebug papers I also HAD to have. {grin} For the ghostess on the right I used the coordinating Ghost Faces set. For the one on the left, I used the dies and then drew in the eyelashes and nose.

They're backdrop is the fun Photo Frame Die cut from black cardstock and then embossed in white with a sentiment from the Ghostly Greetings stamp set. I finished off with some doodlebug stickers. 

Well, that's all for today. I'll be back tomorrow with a bit more Crafty Christmas in October.

Enjoy This Life


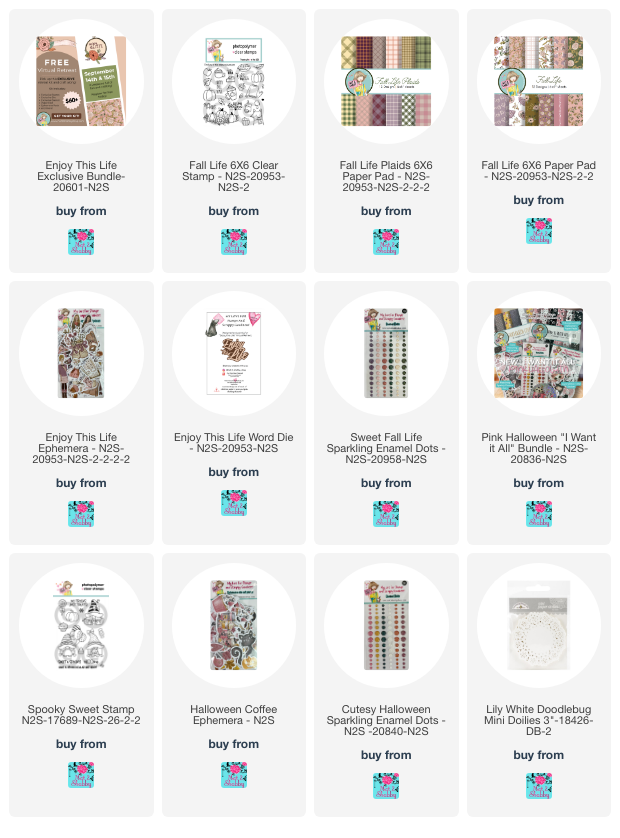
Hi friends! How's your week going so far? I got to spend a lot of time in my craft room this past weekend for the Not 2 Shabby Enjoy this Life Virtual Retreat. If you missed the live retreat, it's all available for free on YouTube, so you can watch the videos and play along.

Today I'm sharing a couple of projects I made following along with Jamie's class. She made gatefold cards with belly bands, and they are so fun. She has a blog post with all the measurements, plus the retreat video if you want to make one yourself. I started with some of my favorite patterns from the Fall Life and Fall Plaids paper pads, inking up the edges with ground espresso ink and choosing a deep brown cardstock for my base and belly band.


I cut the Enjoy this Life die from the same deep brown cardstock, and the shadow layer from vellum, then layered onto a BoBunny mini doily for my circle element.  I used one of the girl ephemera pieces from the Enjoy this Life Ephemera pack, then accented with some of the Sweet Fall Life Sparkling Enamel Dots. I had intended to go all shabby chic with distressed edges, but I like the look of things as it was, so kept my edges clean and embellished with a Prima paper butterfly from my stash.


For the inside, I used the same papers I used on the front for the side panels.  Then I stamped the center piece with the pumpkin floral image and autumn blessing sentiment from the Fall Life stamp set. A bit of sponging and splatters and my first card was done.

I was still itching to do a more shabby chic, distressed look, so pulled out the Halloween Coffee Paper Pad and coordinating ephemera for my next card. This time I used black soot ink all around the panels and roughed up the edges with a distressing tool. 


My circle element for the belly band is a spiderweb doily and I layered a bunch of ephemera pieces to create a little party scene. I did add a bit of black lace to the bottom and a seam binding bow around the entire belly band.

For the inside I decided to use some thinner scraps from earlier projects for my side panels.  I then used the plaid stencil in the Enjoy This Life Bundle with a little black soot ink just in the corner. I finished with another strip of patterned paper and some ephemera.


Thanks so much for stopping by today! If you happen to make something from the retreat videos, be sure to link up to the linky party on the Not 2 Shabby Shop Blog for a chance to win a gift certificate. You have until December 15 to link up, so there's plenty of time to play along. 
Pink and Black Halloween


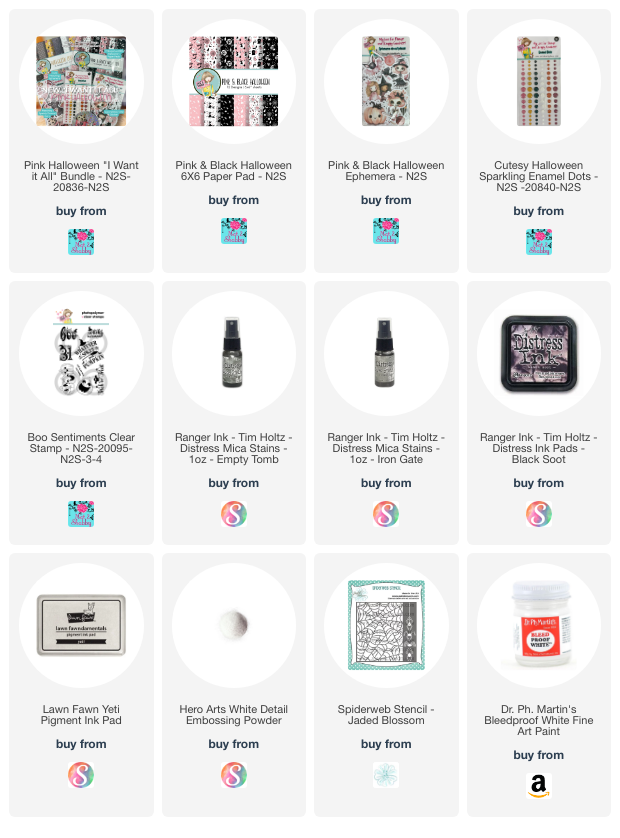
Hi friends! I'm popping in today to share my makes from a crafty session using the Not 2 Shabby Pink & Black Halloween papers and ephemera. I loved these fun colors and have really enjoyed making Halloween cards the past several years, so couldn't wait to get this collection! It sold out quickly when it released, but is expected back in stock within the next few days.

I started with No Scraps Sketch #10 from Bourbon Creek Crafts. Her template allows you to make four cards from two pieces of 6 x 6 patterned paper.  I grabbed four gray cardstock bases to go with the Pink & Black Halloween papers and cut the papers according to the directions.

I thought the Pink & Black Halloween ephemera pieces were so fun that they needed to be the focal points of these cards.  I selected a few different ones that I liked and got to work arranging the cards.


For this first card, I brought in some black and white cardstock to mat the layers, then layered the pumpkin duo on dimensional foam tape over the pumpkin pail.  The sentiment is the Hello Word Die from the Rustic Blooms bundle.


For the next card I wanted to use this large piece of ephemera because the girls are so cute.  I pulled in a strip of black cardstock that I embossed in white with a sentiment from the Boo Sentiments stamp set. I added some doodlebug star and dot stickers for accent.


For my third card, I pulled in a black spiderweb doily from Recollections and a boo word die from Reverse Confetti, sticking with the black and white cardstock, then accenting with the Cutesy Halloween Sparkling Enamel Dots. For this card and the next, I stenciled a cobweb stencil tone on tone onto the card base.


The final card uses a Spooky Sweet sentiment embossed in white on a black circle cut out.  I added some splatters, then decided all the cards needed splatters, so masked off the main bits as best as could and splattered  with Empty Tomb and Iron Gate Mica sprays.

Thanks so much for stopping by today! Have a super crafty weekend!


Coffee Trick or Treat Box


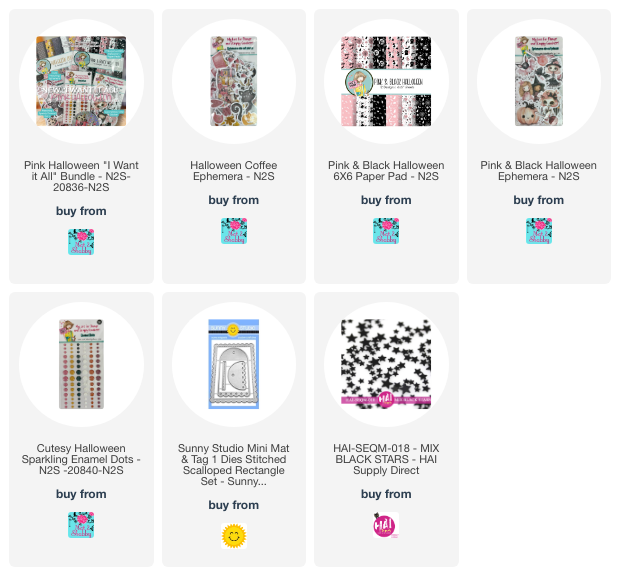
Hi friends! I'm popping in today with a sweet little treat box.  I just received my Pink Halloween Bundle from Not 2 Shabby and I couldn't wait to play. It includes two not to spooky paper pads and coordinating ephemera packs, a pack of Halloween sparkling enamel dots and an adorable vinyl sticker. One of the pads and ephemera is a Halloween Coffee theme, so I was definitely in!

In my YouTube wanderings the other day, I happened to run across a fabulous little gift box tutorial from Angie of Stamping with Amore. Since the box could hold 2 k-cups or a few sweet treats, I immediately thought it would be perfect to use with the Pink Halloween bundle from Not 2 Shabby. I won't go into the details of how I made the box, since Angie does a fabulous job in her tutorial and has a printable inspiration sheet you can download for all the dimensions. She's been a long time favorite channel of mine with tons of crafting tutorials.


I got to work making the box from black cardstock and using the Halloween Coffee paper pad for the layers. I did make a few tweaks to the finishing of the box. I used a velcro closure because I wanted the decor to stay intact when the box was opened, instead of the recipient having to undo the bow. So I punched a couple of small holes in just the front top flap of the box and fed the cord for my tag through  and secured on the inside with the adhesive velcro piece to cover the holes and cording.

I added a 7/8" x 4 7/8" patterned paper piece of patterned paper to the top flap to cover up the cording and holes on the front, then glued on a wide grosgrain bow in the center.

For the tag, I used a tag from Sunny Studios, then chose one of the fun coffee ephemera pieces as my focal point.  I used a yellow stitched circle to tie in the yellow from the top patterned paper and to ground the sentiment, which is a retired one from Reverse Confetti. (The yellows match much better in real life, not sure why they look so different in the photo!)  I finished off with a few star sequins.

Thanks so much for stopping by today! I hope you have a fantastic day! Please note, this bundle was very popular and has already sold out, but definitely put yourself on the waiting list to be notified when it's restocked. At the time of me writing this, there are still some of the Halloween Coffee Ephemera packs available individually.


Spooky Fun Video Hop


Hi friends! I'm popping in today with a little spooky Halloween fun. I'm taking part in a #craftyfunspooky fun video hop on YouTube with some friends of mine from the Crafty Fun with Friends of LV Handcrafted group on Facebook. The theme is spooky fun, so I decided to make a fun Halloween shaker card. You can watch the video below or on my You Tube Channel.


I started by coloring this fun little vampire gnome from the Jaded Blossom Boo Crew stamp set with Copic markers then die cutting with the coordinating outline dies. Once my gnome was all dressed up and ready to go, I started in on my background.  I used both distress and distress oxides in candied apple, lumberjack plaid, aged mahogany, and black soot.


After I finished the background, I pulled out the Coffin Die and used the coffin mat die to create a shaker window for the card.  On the cut out piece I embossed the sentiment in black, then glued it to the card base and layered up the acetate window and foam tape on the back of the main background panel.  I added a mix of sequins and clay embellishments to finish off the shaker.

I then pulled out the bat from the Gnome Dies: Halloween Add Ons, coloring with Copics, then assembling and fluffing up his wings.  I finished with a few sequins scattered around the edges of the card. 

Thanks so much for stopping by today! I hope you have a super creative weekend!


Bone Chilling Halloween

Hi there friends! Today is my day over on the Jaded Blossom blog sharing this card. I've been loving creating Halloween cards lately, and I've got a bone chilling one for you today.

I usually stay firmly on the cutesy side of the Halloween spectrum, but today's card took a little spookier turn. I started by assembling the witch doctor from the Gnome Dies: Monster Add Ons 2 set. All pieces were cut from cardstock. I colored the black pieces with distress inks and all the other pieces with alcohol markers, adding a few white gel pen accents on the feathers where the embossed veins were.  Once he was put together, I thought it would be fun to have a pile of bones behind him, so I pulled out the Clear Jar: Halloween Add Ons and stamped the pile of bones a couple of times, then colored and cut out to place behind my gnomie.

For the background I stamped a red piece of cardstock randomly with stamps from the Paisley set.  I liked the subtle bit of texture it added.  The black panel is gray cardstock that I stenciled with the Spiderweb Stencil in black ink. I think that's one of my favorite stencils!

The sentiment is from the Bone Chilling Treats set and embossed in white on black cardstock, then cut with the coordinating Outline Dies. To finish things off I created a skull and crossbones with the skull and bone in the Monster Add Ons 2, cutting the two bones in half and gluing them behind the skull.  

Thanks so much for stopping by today! I hope you have a fabuolously creative day!

FaBOOlous


Hi friends! Today I'm popping in with a fun little Halloween card featuring the Best Witches stamp set from Not 2 Shabby.

I started by coloring the witch, pumpkin, ghost and spider images from the set with Copic markers, then cut with my Scan 'n Cut machine.  I wanted to try a green background, so masked off a circle and  ink blended with melon ice, grass skirt, deck the halls Catherine Pooler inks, and black soot distr4ess ink.  I kept building up the layers and splattering with water to get a nice texture to the background.  I then peeled off the mask, and masked off the reverse to ink up the outer moon layer.


I decided I wanted a deeper color, but had already torn my mask apart, so I decided to ink blend a smaller circle and emboss the October 31 image from the Boo Sentiments set. I added a few black glaze pen dots to set off the moon, then stamped the spider onto the panel and fussy cut the body to glue on top.

The faBOOlous sentiment is from the Spooky Sweet set released last year. I embossed it in white on black cardstock and added a fishtail end.  I outlined with a silver glitter pen, then layered everything together to finish things off.

Thanks so much for stopping by today! Hope you have a great start to your week.

Monster Dex


Hi friends! It's the first Sunday of a new month and that means it's time to reveal a new challenge on the Jaded Blossom blog. This month the challenge is to use a slanted sentiment. I hope you can play along!

October Challenge:
SLANTED SENTIMENT
(must use at least one Jaded Blossom Product)


For my project today I created a memory dex card, dressed up with the fabulous new Build a Booth: Monster Add Ons from Jaded Blossom. There are so many possibilities with this set, and the shape happened to be a great size match for the Rolodex Dies. This is my first ever Memory Dex card, although I've been collecting the stuff to make them for years. I signed up for a swap just to make sure I'd actually finally make one! It was so much fun.


I cut the main monster pieces from purple cardstock, then used the Mermaid Stencil to add some "scales". For the eyes, I cut the triangular piece three times, once from yellow, once from black, and once from white to layer behind each other to create eyelashes and lids. The eyelashes were created with the stitchmarks from the Gnome Dies: Monster Add Ons 2 set. I also used them for the bow center on the Bow Dies.

My slanted sentiment comes courtesy of the sign die cut in the Build a Booth Dies, embossed with a sentiment from the Candy Corn for Sale stamp set. I finished off with some googly eyes and a Doodlebug bat sprinkle.

Jaded Blossom Monster Mini Release and a Video


Hi crafty friends! I'm excited today because there's a monster-ific new mini release at Jaded BlossomWe have four new items available in the Jaded Blossom shop! Check them all out later in this post. 


I've also uploaded my first YouTube video in almost 3 years. My boys and I have been talking a lot about homework and work ethic lately. Mainly about perfectionism, which they got a double dose of from their Dad and me. I’ve been stressing the importance of getting something turned in rather than waiting for the assignment to be perfect to turn it in. And hand in hand with that, to not let the fear of failing stop them from starting. So here I am putting my words into action with my thing I keep waiting for the stars to align in perfect formation before I start. 

I have two fun projects to share with you today, but first I'll get to the one with the video. I created this sweet monster gnome with the new Gnome Dies: Monster Add Ons 1 set. Most of the pieces are cut from colored or white cardstock and then ink blended.  Once he was done, I decided he needed a spooky background. That's where the video starts and you can watch me create it using Distress Heavyweight cardstock and Distress Oxide inks.  Feel free to watch it here on the blog or over on YouTube.


I created the background using squeezed lemonade, mustard seed, shaded lilac, dusty concord, villainous potion, and black soot distress oxide inks.  I made a circle die cut mask from a full stick post it note about the same size as the moon on the Enchanted Night Stencil Pack (this was the freebie with purchase for our release earlier this month), then got to blending.  I added the bat stencil from the same pack over it.  The hope your Halloween is monsterific sentiment is from the previously released Monster Munchies set and I embossed it in white on vellum cardstock. Then it was just a matter of popping my gnomie up on foam dots and then adding to an A2 card base.


My next project is so exciting. Since the Build a Booth concept came out, I've been wishing for a little treat box die to go with it.  It's finally here with this release and it's fantastic!  For this project, I started by creating my booth using the base Build a Booth Die and the NEW Build A Booth Dies: Monster Add Ons. Frankie was so fun to create!  I wanted to make it look like he was eating the treats, so decided to put my treat box in the front instead of behind.  It works great either way!  I used the Build a Booth pieces to decorate the new Build a Booth: Treat Box Add Ons, then glued it all together and added two of Frankie's teeth to the inside front of the box.


The sentiment is from the previously released Large Halloween Treats stamp set and cut with the coordinating outline dies. I finished off with a few teeny gems for the nails in the booth.

Okay, now let's take a look-see at the whole release...


Gnome Dies Monster Add Ons 2 $33.99

Build a Booth Monster Add Ons $21.99

Build a Booth Treat Box Add Ons $19.99


Thanks so much for checking out my projects! 


Make sure to check out all the design team projects by clicking on their names below.

Let's Be Frank


 Hi crafty friends! Today I'm popping in with a little caffeinated inspiration for you featuring the Halloween Hisses stamp set. If you've been around a while, you might know that I'm a coffee lover through and through/. So when I had a hankering to color and test out some new markers that just arrived I couldn't pass up the chance to color this franken-mug image.

I stamped him with Memento ink, then colored with Olo alcohol markers. I had a lot of fun adding some stubble accents and flecks to his eyes. Next I layered up some paper scraps, matting with a chocolate cardstock.  The sentiment is stamped onto a rectangle from the Card Mat Dies. I finished off with a green puffy heart, then added a little bit of stitching accents to my horizontal strip.

Hope this inspires and you have a fantastically creative day!


Jaded Blossom September Release Blog Hop


Hey Everyone! Welcome to Jaded Blossom's September Stamp Release Blog Hop!
If you're here from Cindy's blog, you're in the right place, if you're just passing through start at the beginning because you don't want to miss a thing. You can find the complete line up at the bottom of this post.

Today I have to projects to share with you.  My first is a card using the NEW Gnome Dies: Graveyard Add Ons. I cut the gnome, coffin, spiderweb, and head stone pieces from white cardstock, then colored with alcohol markers. I coated the spiderweb with embossing ink and then embossed with a silver embossing powder.

Next I moved on to the background.  I just love the new Enchanted Night Sky Stencil that's the freebie for this release.  I decided to ink blend a night sky with chipped sapphire, blueprint sketch, salty ocean, and tumbled glass distress inks.  I splattered a bit of white bleed  proof ink on the top, then stenciled on the bats in black soot.


I added a couple of sentiments from the Candy Corn for Sale set to the coffin and headstone, embossed in sparkly black embossing powder. For the main sentiment, I pulled out the Spooky Season set and embossed trick or treat in white on black cardstock, then cut with the coordinating Outline Dies.


For my second project I created a fun little Octagon Treat Box with orange paper and some black and gray polka dot paper.  I assembled a fun little gnome pumpkin using the Gnome Dies: Spooky Add Ons. The boo glasses are cut from glitter paper and I used the toad's eye pieces to make some googly eyes for my gnomie. I tucked in a few Reese's pumpkins (yum), tied up in a bow, then finished off with a sentiment from the Spooky Season set. and a bat from the Halloween Border Dies.

Thanks so much for stopping by today! I hope you enjoy the hop. All the deals and hop details are below.

And of course we have to have a deal for you right?

Regular Price for the Release Package is $148.99

FREEBIE OFFER: Enchanted Night Sky Stencil
1) Free with orders $50 or more (before tax/shipping)
2) Order MUST contain at least 1 new release item
3) Freebie offer is Thursday and Friday Only, while supplies last


BLOG CANDY

1 Lucky Winner will get to pick a stamp set of their choice!
Just leave a comment on all the blogs along the hop!
The more blogs you comment on the more chances you have to win!

Now on to the HOP....

Just in case you get lost here is the Entire Line Up: