Powered by Blogger.
Showing posts with label Valentine. Show all posts

Sweet Vintage Vibes for Valentine's Day


I am head-over-heels for the new Vintage Valentine EZ Postage Printable from LV Handcrafted! Here’s a quick look at how I put this romantic card together:

  • The Postage Grid: Cut using the EZ Wonder Die #3 from one of the pages in the collection.

  • The Layers: I matted the vintage couple and the heart and roses images on black EZ Wonder #3 Add-ons die cuts and added the fussy-cut heart and bottle as one of my vignettes.

  • The Sentiment: A little "crafty surgery" went into this! I snipped my sentiment from the Gnome Love Card Kit in half and created custom-width black banners by double-die-cutting them with the EZ Wonder #1 Add-ons.

  • The Glow-Up: A white gel pen for detail and Stardust Stickles for a hint of magic.

Does this collection tug at your heartstrings as much as mine? Let me know in the comments! 

✂️💖 Use VERVEGIRL at checkout for 10% off EZ Printables and EZ Card Making Kits! 💌

Thanks for stopping by!

Gnome Love Card Kit! Download & Create 4 Adorable Valentine Cards


Hey crafty friends! How is your January treating you so far? The kids still have one more day of winter break, so I am definitely still in holiday mode over here. However, I had to pop in and share some exciting news from the LV Handcrafted shop!


Gnome Love Card Kit!

EZ1 Gnome Love Card Making Kit

There is a brand new EZ Cardmaking Kit now available in the LV Handcrafted shop, and if these little gnomies pull at your heartstrings as much as they do mine, you are in luck. 

If you're browsing the shop and find other printables you love, don't forget to use my code:

PROMO CODE: VERVEGIRL Enjoy 10% off printable EZ postage, EZ cardmaking kits, and sentiments!


✂️ One Session, Four Cards: The Gnome Love Card Kit

Using the sweet little Gnome Love Card Kit along with my EZ Wonder Die #1 and its add-ons, I was able to whip up four complete cards in just one crafty session!

This kit is designed for efficiency and cuteness. It includes:

  • An EZ guide laid out for perfect cutting with the EZ Wonder Die #1.

  • 6 individual gnome images, plus 2 on the EZ Guide.

  • 2 half sheets of patterned prints.

  • 2 full sheets of patterned prints.

  • 2 full sheets of solid colors.

  • 1 sheet of sentiments (designed to work perfectly with the Ultimate Sentiments Die and other EZ add-ons).


💙 Card Spotlight: Blue Gnome Smiles


For this first card, I paired a solid blue print with one of the half-sheet patterns. Here is a quick breakdown of how it came together:
  • The Image: I cut the gnome image using the dies from the Ultimate Snowglobe Shaker Die.

  • The Sentiment: I used the Ultimate Sentiments Die for the cut and then inked it with Uncharted Mariner Distress Ink to make it pop.

  • The Details: I matted the sentiment with a frame from the same set and added die-cut hearts and two banner ends from the EZ Wonder Die #1.

  • The Sparkle: To finish, I added some rhinestone hearts and a tiny bit of Stickles to the gnome for that perfect touch of shimmer.


💌 Card 2: The Perfect Pair

For my second card, I focused on this sweet little gnome couple. I framed them using the EZ Wonder Die #1 and its add-ons to create a clean, layered look.

  • The Layout: I added a panel at the bottom featuring a coordinating heart print to ground the image.

  • The Sentiment: I used the kit's sentiment, cut and matted with the Ultimate Sentiments Die.

  • The Finish: You know I love my sparkle! I added just a hint of Stickles to give the couple a little extra magic.


🏁 Card 3: Plaid, Hearts, & Dimension

The third card makes great use of the pieces cut from the EZ Guide. That plaid print is definitely a favorite of mine!

  • Edging for Contrast: To create a clear distinction between the light blue heart print and the white card base, I inked the edges with Uncharted Mariner Distress Ink.

  • Handmade Details: I hand-cut a heart from one of the patterned prints and coated it with Glossy Accents and Rock Candy glitter for a thick, sugary shine.

  • Embellishments: I finished the look with more Stickles and a few Sparkle Enamel Dots for extra texture.


❤️ Card 4: Gnome One Compares

The final card used up the rest of my EZ Guide cuts—nothing goes to waste!

  • Background Interest: I ran some white cardstock through my die machine with a heart embossing folder to give the backdrop plenty of texture.

  • Angles & Shapes: I tilted the plaid square on an angle for a more dynamic feel, trimming off the excess. I then layered my fussy-cut gnome over a simple scalloped edge framed circle.

  • The Final Touches: I added banner ends to the corners and used the punny "Gnome one compares to you" sentiment. For the sparkle factor, I applied White Liquid Pearls to the scalloped circles and, of course, a bit more Stickles on the gnome.


Which of these four layouts is your favorite? I'd love to hear your thoughts in the comments!ome.

Ready to get your gnome on? Head over to the shop to grab your free kit before the clock strikes midnight!

Mojo Monday Sketch 1 Revisited


Hi friends! Today I'm revisitng my first ever Mojo Monday sketch with a couple of cards using the December Paper Pad Club from Not 2 Shabby. The Valentine Mice paper pad has a page design that has several cut aparts on it. I cut them with my Brother Scan-n-Cut to use in place of certain layers on this sketch.  For this first card I used some gold matting to dress things up and a heart die cut hanging from her tail for the sentiment.


When I started these sketches way back when I purposely didn't include measurements because I felt it was important for people to feel comfortable using whatever measurements fit their chosen elements, papers, or stamps. But so many people requested them, I started putting them on the later sketches 
So I've updated the sketch graphic, changing the inner panel size to my most commonly used panel now... 3.75 x 5" and adding measurements on the side for those who prefer them. Save the image below and print at 100% and it should be exact.

My second card was given to my husband for our anniversary this past weekend. Hard to believe we've been married for 28 years! I really love this sentiment from the Always and Forever stamp set, so embossed it onto a die cut square. I masked off the edges and blended some tattered rose ink as a backdrop. This is a great way to add matting without adding bulk to an already layer heavy card. 


I finished off with the sweet mouse cut apart on dimensional foam and a few sparkling enamel dots for accent.

Thanks so much for stopping by today! What do you think about revisiting past sketches? Let me know in the comments.


Quick and Easy Gift Card Holder


Hi there friends! Today I'm over on the Not 2 Shabby Shop blog sharing a quick and easy gift card holder tutorial. Hop on over there for all the dimensions and instructions on how to make one yourself! While mine is valentine themed, this little project is perfect for any holiday.


Here's a peek at the inside. I left a space to jot a note, then tucked in a little gift card. 


Thanks so much for stopping by! I hope you have a fantastic day!

Happy Heart Day


Hi friends! I'm back today with a little inspiration using the darling Valentine Critters Ephemera and December Paper Pad Club from Not 2 Shabby.


I just think this little polar bear image is adorable! I nestled him in with a present, then pulled out some papers from the Love & Kisses paper pad. The sentiments are both from the Sweetheart Critters December Stamp of the Month. I love how the long sentiments fit with the Ultimate Sentiments Universal Die. A bit of twine finishes off this sweet little valentine.

Thanks so much for stopping by today! I hope you have a fabulous start to your weekend!

N2S December Inspiration Hop


Hi friends! It's time for the Not 2 Shabby monthly inspiration hop and giveaway! For my video today I'm featuring the December Paper Pad Club and Stamp of the Month. Isn't this little bunny with his bundle of hearts adorable?

I've been battling a cold for quite some time now and finally feel like I'm turning the corner, but my creative motivation has been slow in kicking back in. So for this card, I pulled out something that always seems to get my creative juices flowing a card stock.  This sketch is Mojo  Monday 168 from 15 years ago. Wait, 15 years??? How did that happen!? Definitely an oldie, but a goodie. You can watch the creative process and hear me talk about my approach to sketches a bit in the video below or watch it on my YouTube channel.


Love in the Air


Hello friends! Get ready for some major cuteness because these little Valentine mice are the Not 2 Shabby December Stamp of the Month.

I made these little charmers the star of the show with a subtle blended background of Salvaged Patina and Peacock Feathers oxide inks then accented with white splatter. I stamped the mice onto the background, and then colored a second set (stamped on Bristol paper) using Karin markers and a waterbrush. I added a few highlights with watercolor pencils for extra detail.

To finish, I fussy cut the mice and their hearts, then popped up their heads using dimensional foam for a sweet paper tole effect! Thanks so much for stopping by today! I hope you have a fantastic day!

Love Cats


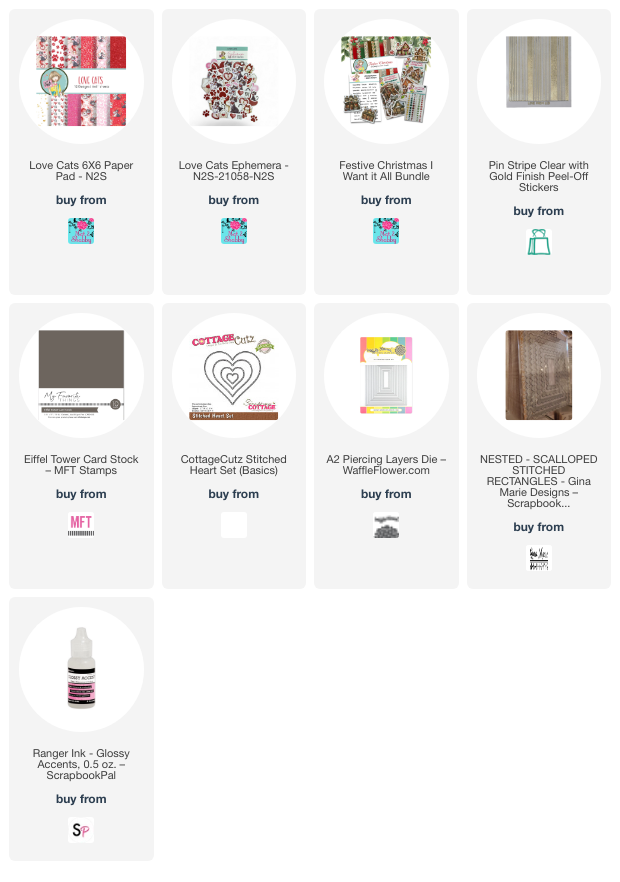
Hi crafty friends! Today I'm popping in with a little Valentine's duo created with the Love Cats paper and ephemera from Not 2 Shabby. I've been trying to be a bit more mindful about what products I purchase for crafting, since 30 years of collecting gets you a whole mountain of supplies. So when this collection released last month, I initially resisted purchasing since I have lots of Valentines products already. But as the month progressed and I saw so many darling cards being created, my FOMO got the better of me and I had to have it,. In return I promised myself I would at least make two cards with it before the season was over.

You know what? I had SO much fun crafting with these kitties and am so glad I purchased them! They really are adorable, and since we're a two cat home and hubby's birthday and Valentine's day are this month, I figured I could make both a birthday card and a Valentine's Day card for him.


For this first card, I picked a couple of sheets from the Love Cats paper pack that I wanted to use, then cut a background piece from one and a big stitched heart from the other. I pulled in the solo boy cat, the envelope and the sentiment from the Love Cats Ephemera.  I wanted a bit bigger of a heart for the sentiment, so fussy cut one of the hearts from the ephemera, then coated with glossy accents and glitter before adding over the original heart.  I chose some gray mats to frame my pieces and finished with a little glossy accents on his eyes and nose.


For the next card, I arranged some of the pieces I had left over from the other card and glued them together for the same sized background.  I accented the seam with a Love from Lizi peel off sticker. I then cut a rectangle to ground my ephemera collage and embossed with gold card stock.  I picked a few pieces of ephemera to create the focal point, embossing the XOXO sentiment from the Mini Messages set that was only available in the Festive Christmas bundle directly onto one of the hearts.

I love how these turned out and I know my hubby will love them too. Because cats. {grin}

Thanks so much for stopping by today! I hope you have a fabulously creative day. It's a long weekend here and all my boys are home, so should be a super fun day.

Big Heart Hello


Hi friends! Today I'm playing along with some friends on Instagram for the #thisorthat hop. This week's theme to choose between is big or small.


I immediately thought I'd go big and use an unused gem in my stash, the Erin Lee Creative Super Jumbo Word + Outlines Dies. I love the dies, but wasn't feeling like it was Super Jumbo enough, so anchored it with a huge Spellbinders Scalloped Heart from the beginning days of die cutting. The heart only fits on an A2 landscape base, but I decided to go portrait and have my heart hang over the edges.


I'm playing along with Danni's Use Your Stash themes this month for her This & That with Danni's Dreams Facebook Group.  On this card I shopped my stash for the big heart dies, the Reverse Confetti heart paper, a falling hearts embossing folder, and heart rhinestones.  I added a bit of pink lemonade blending to the dry embossed panel, then added pink, black, and white splatters.

I added a small little Seasonal Chit Chat sticker with the xoxo. I felt like the contrast between its size and the size of the die cut sentiment really played to the big or small theme.

Thanks so much for stopping by today! I hope you have a fabulously creative day.

Watercolor Bloom with Grace

Hello friends! I hope you had a wonderful Christmas. We had good food and good times with family and now my craft room is overflowing with many new goodies! I can’t wait to try them all. It’s sure to be a fun filled crafty new year.


Today I’m sharing a card I made with the December Stamp of the Month from Not 2 Shabby. These rose images made me want to watercolor so I pulled out my Gansai Tambi palette and got to work.

I started out with a panel of Distress Watercolor paper and I stamped the rose images randomly around the panel with Versafine Clair black ink. Once that was dry, I went in with a wash of a light brown in all the white space around the flowers. I then watercolored the flowers, then stamped the Adore sentiment in the open spaces for some texture.


I had originally planned to cut the background in strips and use them on separate cards, but after I cut them I changed my mind. So I inked around all the wedges and then realigned two of the strips together to form the background.

Next I pulled out more Distress watercolor paper and stamped the focal flower and sentiment. These were both cut with coordinating dies and then watercolored in the same manner with a brown wash in all the white spaces.  I added a panel of Sweet Valentine paper that I sponged with distress inks as a backdrop, then finished with some Kraft matting. My final accents were lots of splatter and a few flat back pearls from my stash.

Thanks so much for stopping by today! I hope you are inspired to go get crafty.


Pretty Paper, Pretty Stamps: A Shabby Chic Card Duo


Hi friends! Today I'm popping in with a bit of inspiration featuring the Not 2 Shabby shop December stamp of the month, Always & Forever. It's no secret that I love the shabby/vintage style so these Sweet Valentine papers from the December paper pad club have had me taking a break from Christmas crafting to something on the sweeter side.


Whenever I get a holiday specific set, I always try to make a non-holiday card with it, so that was the inspiration for this first card.  The layout started how so many of my cards do.... arranging scraps of paper left over from my last crafty session!  I loved these three skinny strips together, so added a fishtail end to the bottoms, inked up the edges and then layered under another scrap of paper.

The flower image is from the beautiful Always & Forever set and I colored with Copic markers in a peachy pink combo.  I used the coordinating dies to cut both the floral image and the sentiment to complete the collage of elements.  To finish off, I ran the front of my card base through the die cut machine with a rose embossing folder for a subtle bit of texture.


For my second card, I fully embraced the Valentine's Day spirit, layering scraps of the Sweet Valentine paper in a pleasing layout and then backing with a panel of light pink cardstock embossed with a heart embossing folder. I colored up the flower in the same colors, then added a Happy Valentine's Day sentiment and some sparkly enamel dots to finish things off.

Thanks so much for stopping by today! I hope you have a fabulous start to your weekend. It's my 27th wedding anniversary today, so we're headed to one of my favorite local restaurants for dinner.