Powered by Blogger.
Showing posts with label Gelli. Show all posts

Grad Card Three Ways


Hi friends! I'm popping in today with a few graduation cards featuring the new Way to Go stamp set from Sweet 'n Sassy Stamps. One set, three ways.

For this first card, I was scrolling through pinterest and saw a bunch of mushroom images watercolored with all colors of the rainbow.  I decided I wanted to give it a go. I haven't done anything but color with Copics for a while, so it was fun pulling out my Kuretake Real Brush Clean Color markers.


I started by stamping the grad hat from Way to Go in no line fadeout ink, then masking it off and stamping the flowers from the My Savior's Love set.  I then used the markers in a rainbow of colors, blending with a waterbrush to get that rainbow feel.  Once I was done with that, I pulled off the mask and watercolored the hat and tassel.

I chose a gel print clean up page I had in my stash to lay the image down and then embossed the Congratulations sentiment in black below the image.  I chose another background from my stash to mat it, and finished off with a teal card base.


Next up is a mini slimline card.  I stamped the hat from Way to Go, then masked it off and stamped the girl from A Little Snarky.  I colored with copics, then cut out with my Brother Scan 'n Cut. I love that the Way to Go Die Set cuts out most of the sentiments, making it easy to layer the sentiment and diploama below.  A little patterned paper and a few enamel dots and I was done.


The final card combines the Way to Go set with the Decorative Frames set.  I first stamped the frame in red ink, then cut with the coordinating die. Next I stamped the stars from Way to Go in either corner.  The we're so proud of you sentiment is die cut and popped up in the center. I added the diploma image in the corner.  A couple of red designer paper prints finish off the layout.

Thanks so much for stopping by today. I hope you have a fabulous start to your week!

Grunge Birthday

Sometimes things don't turn out as planned. Sometimes they sit on your desk half finished for months. Then you pick them up again, play, and set them aside again. And then one day you pick it up again and are able to sort the pieces out and make it into something much better than you had thought that little piece of paper would become.  That's the story of this card.


It started out with a gel print from Lydia's Gel Press Workshop in February. Even though I had watched the video only minutes before, I completely forgot the instructions when I sat down to try the technique (not even sure which one it was now), and got them all out of order. The result was a pull that I loved the colors of, but looked nothing like what I was trying to do. So I set it aside and it sat there for a month or so at the top of my backgrounds pile. When I saw the new Script Stencil from Sweet 'n Sassy Stamps, I thought maybe that was just what it needed. So I pulled out some black embellishment mousse and stenciled it on randomly.  It looked fabulous, but needed a little something more. I then pulled out the new Grunge Elements 3 set and added some random stamping in the background.


I then got set on the idea that I wanted to bring out some of those splashes of pink so pulled out Kitsch Flamingo and stamped up the sentiment in that and embossed it, adding it to the card in a circle and embellishing with some pink embossed and cut out stars. It didn't look right. I set it aside for several days.

Then one day I walked in and I thought what about black? I tossed out the pink idea and embossed the sentiment from Everyday Greetings 2 on black cardstock in silver, then added the row of dots as well.  I then tore the edges of the paper, something I haven't done in eons! To tie in some of the black I pulled out the Grunge Elements 3 again and stamped some of the images again in black and embossed with clear.  I finished off with some black soot around the edges and a black mat on a stone card base. Not my favorite card ever, but I'm sure glad I didn't give up on it!

Thanks so much for stopping by today!

Compensated affiliate links are used where possible. When you place an order after clicking one of my links or the set graphics below, I receive a small commission at no additional cost to you. Thanks so much for using my links and supporting this blog. 💙


Mojo Monday 554


Hi friends! It's Monday and time for a brand new Mojo Monday sketch! I hope you can find a little time in the next couple weeks to play along with me!

As always, we're playing just for fun. I'm an equal opportunity stamper, so feel free to use any papercrafting products your heart desires and enter as many creations as you like. Use the sketch as inspiration for your creation, then come link it up below so I can come take a look! The linky for this challenge will close on March 7, 2021. I have included dimensions on the graphic later in this post, but feel free to change them up to suit your needs, and never worry about substituting a shape or layer.


Earlier this month I got to participate in a gel print retreat and I have all kinds of backgrounds now.  So I thought it would be fun to have a lots of layers sketch this week so I could dip into some of those prints.

The green rectangle, purple squares, circle, and the stamped flowers are all cut from different gel printed pages.  I matted with white cardstock, then added a sentiment from My Thoughts of You and some of the flowers from the Floral Background set to build up all the layers. My back panel is done with the Grunge Dots Stencil in seedless preserves, then blended with the same color. 

Alrighty, now it's your turn! I hope you've been inspired to create something with this sketch. Thanks so much for stopping by. 


Please join me for Mojo Monday!

Click here to enter

Compensated affiliate links are used where possible. When you place an order after clicking some of my links, I receive a small commission at no additional cost to you. Thanks so much for using my links and supporting this blog. ðŸ’™

Hero Arts 2021Catalog Release Blog Hop + GIVEAWAY


I'm super excited today to be joining in on the Hero Arts 2021 Catalog Blog Hop today!  There are so many fabulous new products in the shop that you're going to want to check out and lots of inspiration along the hop. I'm sharing a few cards with some of my faves today.  Be sure and hop along (link list later in the post) and leave some comment love for a chance to win in the awesome giveaway!

My first card uses the new Better Together stamp set and coordinating frame cuts. This is a partner collaboration with Hero Arts and proceeds from this stamp set will be donated to the Human Rights Campaign.  I love this floral layering set and had so much fun playing with it! You'll see a couple more cards with this set from me tomorrow, too.


I started by stamping out the flowers in a light and darker shade of both pink and purple. Setting things up in your MISTI, so you only have to align one time, makes the layer stamping a breeze.  I did the same with the leaf shapes in green, then die cut them all with the coordinating frame cuts.

The large sentiments in this set are perfect for both A2 cards and slimline cards.  I went with a slimline design with this one, masking off a rectangle on a white panel, then blending with blues and stamping the sentiment in black.  I matted with navy cardstock, then added the panel to the slimline card base with a foam sheet for added dimension.  Then I layered on the flowers and finished with some white gel pen accents and liquid drops.


My next card features a sentiment from Better Together paired with the gorgeous Hero Florals Poppy Combo. I colored up the poppies with Copic markers, then cut with the coordinating frame cuts and arranged in descending order on my card base. The sentiment is embossed in white on black cardstock and popped up on dimensionals. 


Last weekend I was lucky to be able to participate in a virtual gel press workshop.  The focal point of this card was one of the techniques in the class using bleach as a mask for a stamped image. I then cut the print with a circle die and matted on black.  The background is blended in red, orange, and yellow to match, and I finished with a sentiment from the fabulous new Empowerment set.


My final card for today uses a couple of my brayered off prints from this weekend. I thought the blue really matched the storm part of this sentiment from Empowerment, and then added some stamped and die cut flowers from the Hero Florals Poppy Combo. I watercolored the flowers, then accented with Copic markers.  The sentiment is embossed onto a strip of vellum.

That's all from me today. I hope you enjoyed these creations. There are tons of new products in the 
2021 Catalag Collection, and lots of inspiration with them along the hop! Check out the prize info and full hop list below.

Your next stop on the hop is Laurie Willison.

Prize Info
Comment on the hop by Wednesday, February 24th at 11:59pm pst for a chance to win one of three $50 gift certificates to the Hero Arts store. The more blogs you leave comments on, the more chances to win!


Full Blog Hop List


Compensated affiliate links are used where possible. When you place an order after clicking one of my links, I receive a small commission at no additional cost to you. Thanks so much for using my links and supporting this blog. 💙

Nope Not Today

Hi friends! Happy Friday! This month Sweet 'n Sassy Stamps is celebrating their 13th birthday with a new sale every week. This week's sale is 20% off stamp sets in the Backgrounds and Creative Worship Stamps categories. It runs today through November 19. Three of the sets I used on today's card are included int he sale.


My Dad was recently in the ICU for a week and this is a card I made during that time. There were so many emotions and fears rattling around vying for space in my head, so I tried to focus them into this card. It's amazing how cathartic the process of creating can be. I didn't feel much like stamping during that time, but I'm glad I sat down and made this card.


I started with a gel print I had made in a previous session with pink and magenta paints. I cut the print down to card size, then embossed one of the peonies from Encouraging Peonies in white all around the edges. I also embossed one flower on the leftover panel to fussy cut.  I grabbed a few leaves I had already cut and colored and added them behind my solo flower.

For the sentiment, I knew I wanted to use the nope not today from the new A Little Snarky set.  I first stamped the post it not from Just Say Jesus, then stamped the sentiment and blended with antique linen, vintage photo, and ground espresso. Next I added the faith over fear sentiment from Faith Wordfetti. I cut this out, then decided to use the library card from Your Story to represent a medical chart. I stamped it from manila cardstock, then blended with the same inks and fussy cut.  The clip is also from that set, stamped in black from the same paper and fussy cut.  


I layered everything together and added added it to the card base on a foam sheet for some added dimension.

 Thanks so much for stopping by today! If you have a chance be sure to check out the sale at Sweet 'n Sasssy Stamps!


Compensated affiliate links are used where possible. When you place an order after clicking one of my links, I receive a small commission at no additional cost to you. Thanks so much for using my links and supporting this blog. 💙

Best Yet and a Summer Kick-off

Hi friends! I'm popping in today to share a couple clean & simple cards.  As soon as I saw the Dazzling Dahlia set, I knew I wanted to make a gel print and then emboss the flower in white over it.


So that's what I did, using acrylic paints in pinks, purples, and a bit of white on my gel plate until I had a background I liked. Then I dried it really thoroughly and embossed the flower in white.  I did the same thing for the leaves with a gel print of greens.  Then I fussy cut everything out and layered it together.  I absolutely loved the way it looked, but kept fussing over a layout.  Every time I tried it on a card I just felt like any background distracted from the beauty of the flower.  So I finally decided to {gasp} cut the flower in half and make two cards out of it.


I picked two sentiments from the Inspirational Word Art 2 set and stamped them in the open area of a white card base, then popped the half flower images up on foam tape along the outer edges.  I added a few holeless sequins for accent on one and just added the leaves on the second.


Easy peasy, no fuss coloring, and two encouragement cards ready for the mailbox!

Sweet 'n Sassy Stamps is having a FABULOUS sale this weekend. Every order is at least 10 - 25% off through June 30... the more you buy, the more you save! A great time to pick up some new inspiration!


Thanks so much for stopping by today! I hope you have a fabulous rest of your day!

Compensated affiliate links are used where possible. When you place an order after clicking one of my links, I receive a small commission at no additional cost to you. Thanks so much for using my links and supporting this blog. 💙 

Slimline Hello Friend

Hi friends! Today I'm popping in with a slimline card. These seem to be all the rage right now, and I'm kind of enjoying trying out a different canvas size.


I had this sweet little kitty from the Party Pals set already colored from an earlier crafty session, so decided to make here the star of my card.  The background is a leftover gel print from a previous project.  I liked how the colors coordinated with the already colored balloons. I cut the panel down, then matted with a thin layer of black cardstock. Next I popped up the kitty on foam tape and embossed some clouds from the Friendly Rainbow set (this set was a limited edition promo and is no longer available)  with speckled egg ink and embossing powder to give the effect of her floating in the sky.


My layers are cut from some new slimline dies I ordered, then I finished off with a crisp little sentiment from the Friendly Rainbow set embossed in white on black. Such a fun card to create. I think I'm going to really love creating slimline cards. My finished card is 3.5" x 8.5".

Compensated affiliate links are used where possible. When you place an order after clicking one of my links, I receive a small commission at no additional cost to you. Thanks so much for using my links and supporting this blog. 💙

Gel Press Fun for Father's Day


Hi friends! For today's card, I pulled out my gel plate and some acrylic paints. I dropped a drop of paint from rainbow colors down the side of the plate, then rolled out with my brayer and pulled a print with thin cardstock.  I then place the images from Gear Up on a large acrylic block and sponged with black acrylic paint.  I stamped this directly onto the printed background.  Yes, you can use acrylic paint on your clear stamps, just remember to clean them quickly so the paint doesn't dry on the stamp.


I cut down my panel and matted with black cardstock. Then I used my MISTI to stamp the hardware down the side, moving up in the MISTI for each repeated stamping so I got an even line.

The sentiment is from the sweet Super Dad set (this one's  in our 50% off sale) and I stamped it on white cardstock and popped up with foam tape. This card is super easy to mass produce, and a fun masculine design.


Thanks so much for stopping by! Hope you have a fabulous weekend. It's a big one for us with my Mom's birthday, my Father-in-law's birthday, and Father's Day.

Compensated affiliate links are used where possible. When you place an order after clicking one of my links, I receive a small commission at no additional cost to you. Thanks so much for using my links and supporting this blog. 💙

June 2020 My Monthly Hero Release Hop + GIVEAWAY

Hi friends! It's time to kick-off another My Monthly Hero release! The June kit is filled with glorious summer imagery, AND a 6 x 6" cling background! I had so much fun creating with these fun stamps and dies and I'm sure you will too!


If you've been hopping along, you should have arrived from Jessica Frost-Ballas' blog. Your next hop stop after this will be Laurie Willison's blog. The entire hop list can be found later in this post.

GIVEAWAY:
Hero Arts is generously giving away one $50 gift card, drawn from the comments left across the hop. Enter by Sunday, June 14th at 11:59pm pacific, and the winner will be announced on the Hero Arts blog the following week.


Since I was a little girl, I've always had a thing for lighthouses, so the lighthouse die from the June Kit was the first thing I dove for.  I cut it from black and white cardstock, then colored the window and highlight pieces in the rocks and in laid them with the black die cut.


Next I stamped the beautiful background from the kit in blue inks, using a different color for the two different sections.  I then stamped just the skinny strip on a square of paper, masking off the other portion of the square and then sponged with navy and pool party inks for a little depth. After that was how I liked it, I masked off the stamped section and then pulled out the Sun Background Stencil and stenciled the sun with lemon drop reactive ink.  The beacon of light sentiment from the kit is stamped inside the sun, and then I layered the lighthouse atop, and then finished with thin black mats on the panels.
 

For this next card, I was in the mood to do a little ink blending  I started by masking off a portion at the bottom of the card base for the water, and cutting a mask for the mountains and then got to blending with reactive inks.  I did the sky with berry smoothie, taffy, fruit punch, creamsicle, and lemon drop.  I then decided to go over the bottom portion of the card with gesso to cover up some inky fingerprints, so the white would show through on the mountains. While I was adding the gesso, I added some finger swirls in the bottom section to give the water a little texture.  Then my masks went back on and I blended the water with splash and blue hawaii inks.


I then die cut the mountains from pitch black cardstock and layered over the scene, adding a few highlights with a white gel pen.  I felt the sky and sea looked a bit too smooth, so I took a dry fan brush and dipped into a small amount of gesso and dry brushed onto the blended panel.  The bird from the kit looks perfect stamped up in that cloudy sky, then I added a few of the little diamond stars in unicorn pigment ink up toward the top left.  The sentiment is from the Affirmation Messages set. I thought it just fit perfectly with these big, bold mountains.


My third card features a couple of the add-ons from this release.  I started by taping a Nesting Ovals Infinity Die to the Music in the Night Window Die to cut a frame from pitch black cardstock. I then coated it with a layer of clear embossing & watermark ink, then embossed with black sparkle embossing powder. I love the sparkle!


Next I pulled out my gel plate and made a quick pulled background with blue, purple and white acrylic paint.  When it was dry, I used the Shooting Star Stencil with black paint. It wasn't quite as noticeable as I wanted, so I then laid the stencil over it again and gave it a coat of white glitter gel for some pizazz!

I decided to try a slimline card, so pulled out the stencil again and stenciled all over with splash reactie ink, then just around the edges with thistle reactive ink. I cut this panel down, then added a strip of amethyst cardstock that I scored every quarter inch for some interest. I finished with a sentiment at the bottom from the Dreams Will Blossom set. The final card measures 4.25 x 7.5"

You made it to the end! I hope you've enjoyed my makes and a bit of my creative process. If you're not a subscriber already, the kit is only available while supplies last, so pre-order your kit todayHero Arts is working on restarting our operations in a safe manner, bringing back our production and shipping teams with social distancing, and keeping our warehouse cleaned under the strictest standards. We are first focusing on all of the orders in-house for all of our wonderful and patient customers, subscribers, and international customers, and hope to get back to regular shipping times once we are through what was delayed. We estimate June kits and add-ons will begin shipping on Friday, June 19, after all previous orders have gone out.

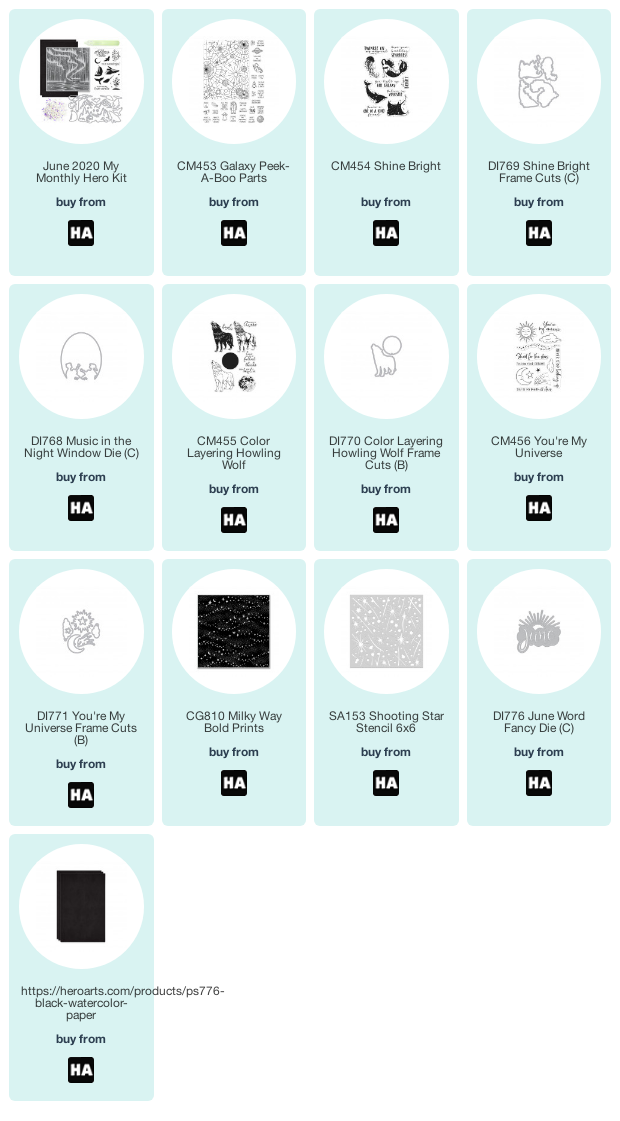
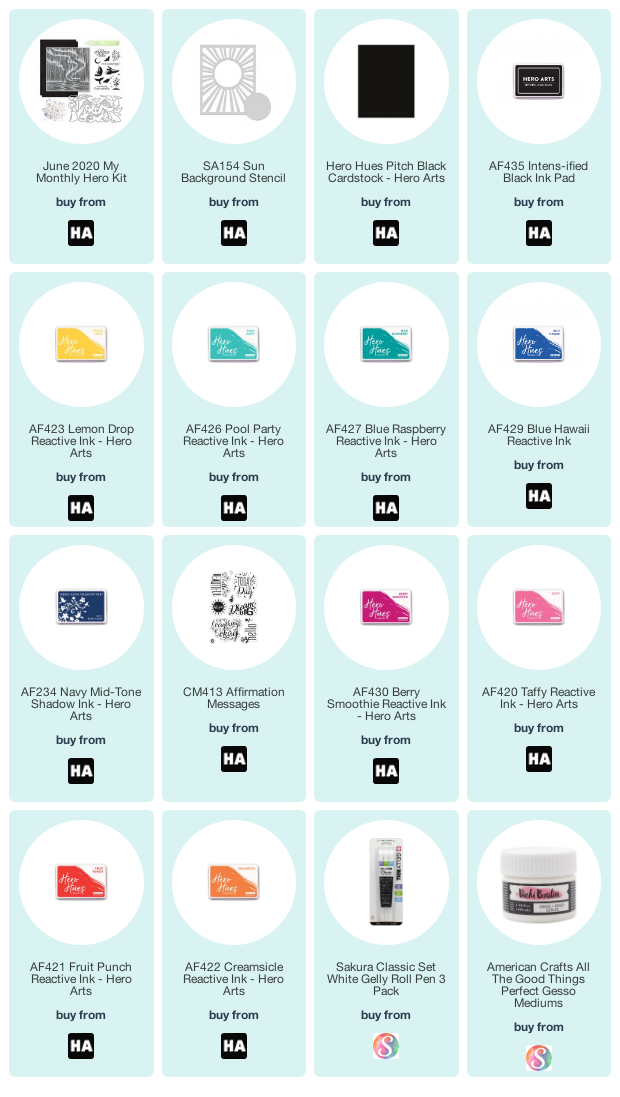
Here's a closer look at the June My Monthly Hero kit. I've also linked the entire release along with the supplies I used for these cards below for your convenience.

Kit Contents:
  • 4" x 6" Clear Stamp Set
  • 6" x 6" Northern Lights Cling Stamp
  • 3 Fancy Scene Dies
  • 10 Coordinating Frame Cuts
  • 2 5.5" x 8.5" Sheets of Black Handmade Watercolor Paper
  • Glow In The Dark Lacquer Pen
  • Shiny Silver Stars
Kit Value: $74
Kit Cost: $34.99


For a chance to win the $50 Gift Certificate giveaway, leave some comments for the talented designers linked below.  
Happy hopping!

Next up on the hop is Laurie Willison

Hero Arts
Amy Kolling
Channin Pelletier
Daniel West
Debi Adams
Ilina Crouse
Janette Kausen
Jennifer McGuire
Jessica Frost-Ballas
Julee Tilman  ←That's me!
Laurie Willison
Lydia Fiedler
Maria Willis
Mariana Grigsby
Michelle Short
Nichol Spohr
Seeka

Compensated affiliate links are used where possible. When you place an order after clicking one of my links, I receive a small commission at no additional cost to you. Thanks so much for using my links and supporting this blog. 💙

June My Monthly Hero Release


My Supply List

Gel Print Hello

Hi friends! Today I've got a fun card to share that I made for last week's Mix-ability challenge over on Splitcoaststampers. The challenge was to make a mixed media card, confining your artwork to a 3 x 3" square.


To start I pulled out my gel plate, a brayer, and some acrylic paints. I chose some deep fall colors, creating several layers until I was happy with the overall look of my piece. I then cut it down to a 3 inch square and mounted on a foam sheet.


Next, I grabbed the beautiful Tall Blooms stamp set from Reverse Confetti and embossed it in gold on vellum. I then mixed up a little Mango Tango spray with some crystal clear lacquer and painted the leaves.  I hand trimmed the two sprigs, then layered together and accented with a bit of gold thread and a rhinestone.  I finished with a white card base and the a happy hello sentiment embossed in gold. Clean and striking. One of my favorite cards in a while!


Thanks so much for stopping by today! I hope you have a super awesome start to your week!

Compensated affiliate links are used where possible. When you place an order after clicking one of my links, I receive a small commission at no additional cost to you. Thanks so much for using my links and supporting this blog. 💙