Powered by Blogger.
Showing posts with label Special Blooms. Show all posts

Bright Blooms


Hi friends! Today I'm sharing a bright little card to add a little sunshine to a dreary January day. It's definitely been cold and dreary here in Idaho. So I pulled out one of the stamp sets I designed for Sweet 'n Sassy Stamps and got to work with a fun yellow and blue color palette.

For the card, I started by stamping the image from Special Blooms in Memento ink, then coloring with Copic markers. I die cut with the coordinating dies, layering up three die cuts for dimension. The sentiment from the same set is embossed onto a circle die cut with dress blues ink and clear embossing powder. I then overstamped the circle with the Script Background stamp in limoncello ink.
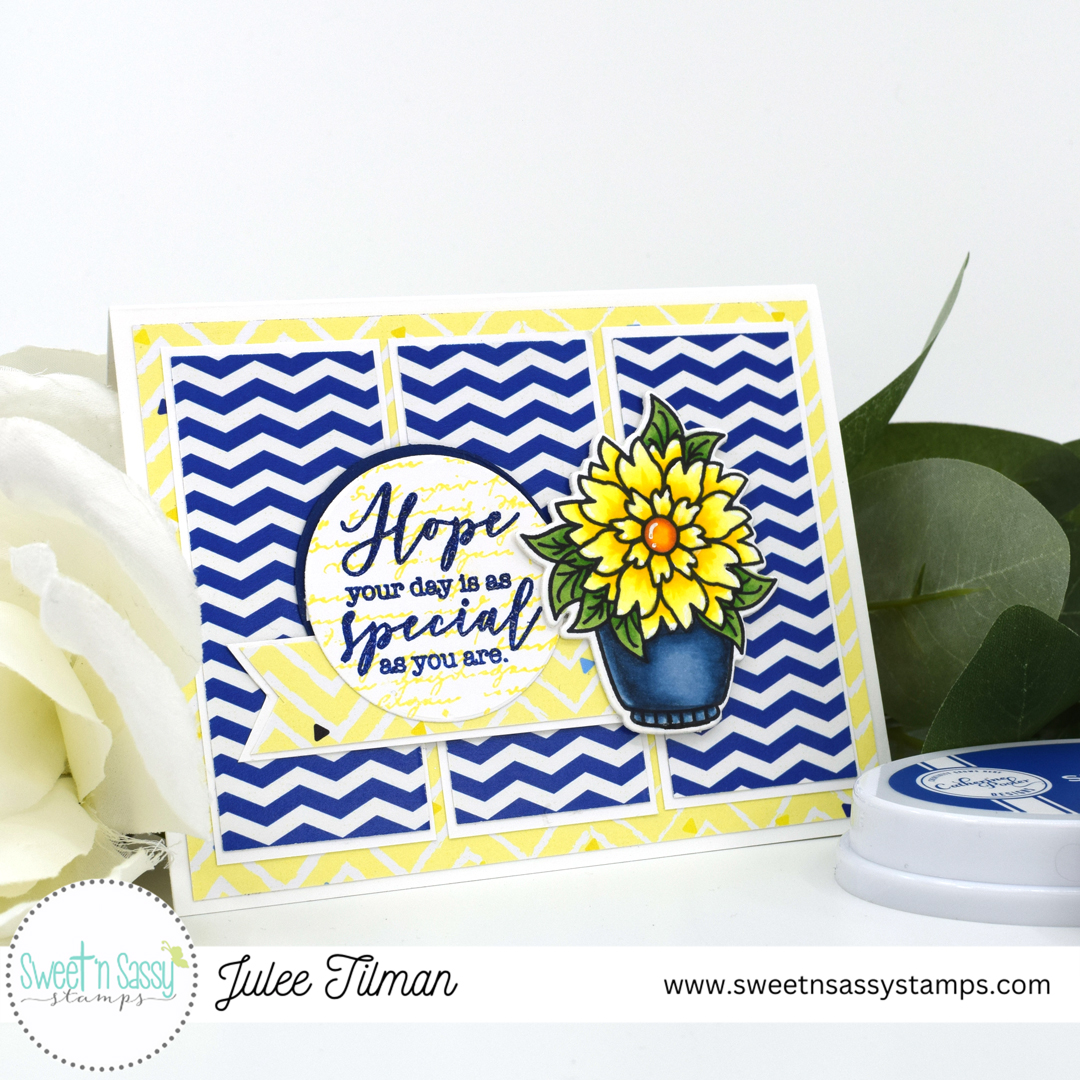


The layout was inspired by Mojo Monday sketch #444. I used papers from an old paper pad from Not 2 Shabby. This one was called Lemon Brightness, but it's not currently available. I do love it, though, and am trying to use more of my ginormous stash of stamping goodies this year.


Thanks so much for stopping by today! I hope your day is as special as you are!


Double Dose of Caffeine


Hey friends! Today I'm popping in to share a couple of cards featuring my Special Blooms set that released this month with Sweet 'n Sassy Stamps.

For this first card, I colored the cup and the bloom image with Copic markers, then accented with white gel pen.  I cut with the coordinating dies. If you're inspired to shop, you'll save a bit if you buy the stamp set and dies together in this bundle.


I was feeling like getting my fingers inky, so pulled out some kraft cardstock and stenciled it with the Grunge Dots and Paint Splatters Stencils in varying shades of brown ink. Next I embossed the sentiment directly on the panel and inked around the edges.  

The butterfly was already colored and fussy cut from a previous art session. It's from the Spread Your Wings stamp set and I had coated it with embossing ink and sparkle embossing powder for extra shine.  I then decided placement and stamped the same butterfly in black directly on my stenciled panel and popped up the butterfly to finish things off.


My second card is a simple one, making use of patterned paper from my stash for an easy layout. The sentiment is stamped onto a die cut circle, then I added the cup and bloom image and a bit of skinny ribbon from days gone by. There you have it, one stamp set two different looks.


Thanks so much for stopping by today! I hope your day is filled with lots of happy.


God Bless the USA


Hi friends! Happy Wednesday! It's time for the June Sweet 'n Sassy Stamps Hop over on Instagram. This month we're sharing our patriotic and summer themed cards. There's a chance to win, so head on over to my Instagram feed for all the details.

I started by stamping the solo bloom from Special Blooms three times, then coloring them red, white, and blue with Copic markers. I cut with the coordinating dies, then added a bit of stickles to the centers and set aside to dry. 


I then made a quick panel, swiping some blue and red ink pads across a white piece of  cardstock.  I matted this with navy cardstock, then picked a fun patterned paper for the background and sentiment.  The sentiment is from the God Bless America and embossed onto the patterned paper. Next I arranged the flowers, dividing the red and blue panel with the white flower, then finished off with some crystal stars.

Thanks so much for stopping by today! I hope you have a wonderful day!

Special Days

Hi friends, today I'm popping in with a little inspiration with my newest release, Special Blooms. I love me some flowers, so couldn't wait to color these images up.

I went with a pink combo for the flowers, and a blue for the pot and background, coloring the images with Copic markers and then cutting with the coordinating die cuts.  I wanted a little more dimension, so I stamped and colored the pot flower again and cut out just the flower to pop up over my die cut image.


For the darker panel, I masked off a rectangle, then blended the entire panel with a stone blue. Next I stenciled over the blended piece with the Diamond Tile Stencil in a dark blue. Not wanting to waste the ink still on my stencil, I spritzed it with water and then pressed it to a white panel for the main card background.  I finished off with some blue cardstock, and a vellum sentiment embossed in blue.

Thanks so much for stopping by today! I hope you have a fabulous day!