Powered by Blogger.
Showing posts with label Card Concept. Show all posts

Rainbow Hearts

Hi friends! I'm popping in today with a fun little rainbow card I made with the new Forever & Always stamp set from Sweet 'n Sassy stamps. I just love these fun patterned hearts.


I was inspired by the current inspiration photo at The Card Concept to pull out a rainbow of distress oxide inks and get to work. Here's the graphic, isn't it lovely?


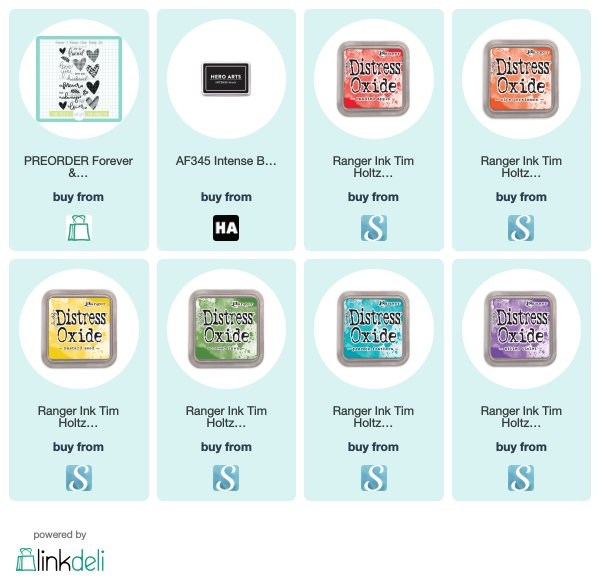
Each die cut square is smooshed in the same color distress oxide ink as I stamped the heart in. My rainbow of oxides consists of Candied Apple, Ripe Persimmon, Mustard Seed, Mowed Lawn, Peacock Feathers and Wilted Violet. I hand trimmed each heart, then popped up on foam tape for dimension. The finishing touch was the love you sentiment from the set stamped in black on the first square.


I had so much fun making this clean and simple card. A splash of color was just what I needed for a dreary, weary day in the craft room, too!


Thanks so much for stopping by today! I'll be back tomorrow for the My Monthly Hero February release.

Affiliate links are used where possible. When you order, I receive a small commission at no additional cost to you and you receive happy mail! Win, win! Thanks so much for clicking on my links to shop

Gourd-geous Card Concept 100

Hi friends! I am so honored to be one of the guest designers joining The Card Concept as they celebrate their 100th challenge. The inspiration photos in this challenge, never fail to inspire, and this one is absolutely gourd-geous, don't ya think?


I definitely thought so, and immediately pulled out the Autumn Bounty stamp & cut from Hero Arts to make some beautiful, shabby gourds. I used papers from the Love Story collection by Prima, picking portions of the paper to stamp on that could pull in some of the florals like the inspiration photo.  These are all embossed in gold and shaded with antique linen and gathered twigs distress ink.  I also stamped the you're gourd-geous sentiment on patterned paper and embossed in gold.

I chose a woodgrain paper from the Amber Moon collection and crossed the two strips to create a little backdrop for my pile of gourds. Over this, I layered a bit of cheesecloth and then started composing myt scene with all my stamped and cut gourds.

I cut a banner tail for the sentiment, then topped it with a butterfly I die cut from shiny gold and book paper with the Tim Holtz Mini Detailed Butterflies set, I topped this with a Prima butterfly from the Misty Rose collection and added some christmas cheer Shimmerz paint to finish it off.  And the final accent was a string of faux gold beads lining the tops and bottom of my woodgrain panel.


Thanks so much for stopping by today! I hope you're inspired to play along. Hop on over to The Card Concept Blog to see all the fabulous creations and get all the challenge details.  We can't wait to see what you create!


DC244 Autumn Bounty Stamp & Cut
[ HA | SBC ]
Prima Marketing Love Story-6x6 Paper Pad
[ AMZUS ]
Prima - Amber Moon Collection - 8 x 8 Paper Pad
[ SBC ]
Sizzix Alterations Mini Detailed Butterflies Thinlits Dies
[ SBC ]
Shimmerz - Christmas Cheer
[ SHM ]
Snow Cheesecloth Trim - 36" | Hobby Lobby | 80869679
[ HBL ]
Prima - Misty Rose Collection - Flower Embellishments - Taylor
[ SBC | AMZUS ]
PW100 Gold Embossing Powder - Hero Arts
[ HA | SBC ]
Tsukineko - VersaMark Watermark Ink Stamp Pad - Large - Clear
[ SBC ]
Ranger Ink - Tim Holtz - Distress Ink Pads - Mini - Antique Linen
[ SBC ]
Ranger Ink - Tim Holtz - Distress Ink Pads - Mini - Gathered Twigs
[ SBC ]
Ranger Ink - Tim Holtz - Mini Ink Blending Tool - Round
[ SBC ]
Ranger Ink - Detail Blending Tools
[ SBC ]
Ranger Ink - Stickles Glitter Glue - Stardust
[ SBC ]

Shabby Love

Hi friends! I'm back with another shabby chic card. When I saw the current inspiration photo at The Card Concept, I just couldn't help but reach for the new Love Story collection from Prima. It seemed the perfect fit. On a recent shopping trip to Tuesday Morning, I found this Love die and some bird embellishments, so I knew I had to find a way to incorporate them as well.


I started with a watercolor tag from Prima, watercoloring with the same watercolors I used in yesterday's card, then die cut the word Love from the center. I splattered some white and black indi ink and set aside.  Next I cut the love word again, then watercolored softly with the rose gold and inlaid.

This paper seemed to match the flowers in the photo, so I chose it as the backdrop, then started layering flowers from my stash.  I added some gold rose watercolor paint to some of them, then started in on the bird element.  It started out as a shiny silver bird, so I first coated it with a layer of heavy gesso, then added a whole lot of different colors of Finnabair wax to achieve the look I wanted.  I finished off with some white leaves, dusted with more of the rose gold watercolor and some vintage silk wax.


Thanks so much for stopping by today! Hope you have a fabulous day!

Enabler's List
Paper: Love Story (Prima), watercolor tag pad (Prima), white (Neenah)
Ink: Wild & Free watercolor collection (Designs by Rachel Beth), bombay india inks (Dr. Ph. Martins)
Accessories: flowers & leaves (Prima), Live Love Laugh die (Momenta), Salvaged stamped metal bird (BCI Crafts), paper distresser, vintage silk, white gold, rich copper, brushed iron Finnabair wax (Prima), hot glue gun

Coffee and Love

Hi friends! Welcome to another Monday.  The boys are healthy and in school and I'm sipping an Americano, listening to some soft jazz , editing photos and packaging a restocking shipment of dies this morning. A pretty good start to the week!


Over the weekend, I took a little bit of me time and hit the stamp studio armed with the beautiful new Coffee & Love digital set from Graciellie Design.  I just couldn't wait to color the beautiful flowers and to go cup.  I  imported the individual files into a photo editing software and resized the cup photo to 3" wide, I then added the sentiment, resizing to 1.125" wide, and added a solid 1.5" circle and an inner 1.375" stitched circle, then filled in  the sheet with some of the other sentiments and multiples of the mug before printing on cardstock with a laser printer.

All the coloring is done with Copic markers, and I colored and cut one additional flower image from one of the multiples I had printed, and popped it up to add a little dimension.


I was inspired by the inspiration photo at The Card Concept. Love the look of flowers and wood grain and that combination always makes me think of shabby chic. I pulled in the woodgrain with a bit of Prima Rose Quartz paper and also added in some highlights to the java jacket, giving it a bit of a woodgrain look as well.

The sentiment is lightly sponged with milled lavender and dusty concord distress inks, as is the today 3X4 journaling card from Prima's new Lavender collection.  I added a doily, a rhinestone flourish as the steam and finished off with a bit of glitter and a twine bow.

Thanks so much for stopping by today! I hope you have a wonderful start to your week!


Enabler's List
Stamps: Coffee & Love Digital Set (Graciellie Design)
Paper: rose quartz 6 x 6, lavender 3 x 4 (Prima), crumb cake (SU!), white (Neenah)
Ink: laser printer, Copic markers, milled lavender, dusty concord, hickory smoke, black soot (Ranger Distress)
Accessories: circle dies, glitter, doily, natural twine, rhinestone flourish, corner rounder, paper distresser

Hope Lifts

Hi friends! I'm back today with a sample using the all new All My Love DIGITAL Set. I got a little crafty time this weekend and couldn't wait to use this fun little hot air balloon image.


I'm also sneaking in just under the wire for the current challenge at The Card Concept. I loved the inspiration, especially the soft pinks and blues and the bows and that's where I started with this shabby chic card.


The papers are from an older My Mind's Eye Collection and I printed the pdf version of the digi set on cream cardstock, then colored with Copic markers and cut with die cuts.  I layered some fun papers and a scalloped border die cut across the bottom and finished with a hint of sparkle on the hearts and a seam binding bow above the sentiments.


Thanks so much for stopping by today! Hope your Monday is looking up! :)

Enabler's List
Stamps: All My Love DIGITAL Set (Verve)
Paper: Love Me (My Mind's Eye), cream (Neenah)
Ink: laser printer, copic markers
Accessories: Stitched ovals, pierced squares (Cottage Cutz), scalloped ovals (Spellbinders), border die (MFT), seam binding, morning dew Nuvo drops (Tonic), glitter

Shabby Chic Orange Fall

Hi friends! I'm popping in today with a fun little shabby chic creation using the new Autumn Leaves stamp set from Verve. I'm home sick with one of my boys today, but he's happily entertained with some multiplication flash cards while I'm writing this post. Hooray for little math minds!


This card was created for the Orange Falliday Fest challenge on SCS. The challenge is to create something using items that start with at least four of the letters in the word ORANGE. I pulled out the beautiful Amber Moon collection again and started in layering some papers, then stamping the pumpkins and the happy fall sentiment from Autumn Leaves on pieces of designer paper. I was also inspired by the neutral color palette and pumpkins in the current inspiration challenge at The Card Concept. I previously made a completely different card for this challenge. Love how both were inspired from the same photo.

Tip: When I color with Copics, I like to use archival ink, but the ink is never dark enough.  Even when freshly reinked and stamped 3 or 4 times, it always looks a little faded. So to get a crisp look, I stamp in the MISTI, then color with Copics while it's still in place in the MISTI, then stamp again with a dye ink to get a super vibrant stamped look.  Works like a charm and makes me a happy stamper!


The leaves were stamped on a journaling card the other day, when I went a little crazy stamping leaves. Like seriously fun. Two step stamping was one of my first loves and the Watercolor Minis stamp set from Stampin Up got some serious love. I did the rock n' roll technique here, first inking the solid stamp with warm sunshine ink, then rolling around the edges with a crimson ink pad to get the two toned look.  This is so much easier to do with mini ink cubes than it was back in the day! I just eyeballed it and got them to line up perfectly and stamped to my heart's content, then cut with the coordinating Falling Leaves Die Set.

Next I had a lot of fun, assembling my elements.  I laid down some lace trim, then pulled out this gorgeous flower that had glass glittered edges, then added a smaller similarly colored flower from a different collection. I tucked in some metal embellishments, then looped some natural twine in a wreath like fashion as a backdrop for my stamped pumpkins and leaves. I distressed the edges of my paper layers with brushed corduroy distress ink and a paper distresser. Next I wanted to extend some of that glitz to the pumpkins, so added a bit of clear glass glitter to the top and bottoms of the pumpkins. I finished off with the little birdie I fussy cut from a piece of designer paper and then popped up on top of the leaves from the sentiment.


This was so much fun to create and I hope you enjoyed reading a little about the process. I'm truly smitten with Prima's most recent collections and I'm sure you'll be seeing quite a bit more shabby chic from me for a while. Thanks so much for stopping by and I hope you have a wonderful weekend!

Enabler's List
Stamps: Autumn Leaves (Verve Stamps)
Paper: Amber Moon 6 x 6, Amber Moon 3x4 Journaling Cards (Prima), white (Neenah)
Ink: coffee archival, brushed corduroy distress (Ranger), warm sunshine, crimson, espresso (Altenew), Copic markers
Accessories: Falling Leaves Die Set (A Cut Above by VERVE), Engraver's and Amber Moon flowers (Prima), Coppper Leaf Embellishments, Antiqued Bronze Filigree pieces (The Funkie Junkie Boutique), natural twine, German glass glitter (TCP), paper distresser (Prima), vintage lace trim, fabritac glue

Other Links
The Card Concept challenge
Falliday Fest Challenge
Rock n' Roll Technique Tutorial

Here are the letters I used for the challenge:
O - orange pumpkins
R - robin. I don't know anything about birds, except that crows who build nests in your front entry way are SUPER protective of their babies and will swarm in on you and peck you to death walking out to get your mail, and none of the pest control specialists answer their phones or return voice mails, so always use your car to back out and check the mail in the spring, praying for baby birds that are ready to leave the nest super quick! Anyhow, I'm calling the sweet little birdie a robin... don't correct me if I'm wrong.{grin} But I also used red ink, to be safe.
A - Amber Moon collection, Autumn Leaves stamp set
N - natural twine
G - German glass glitter
E - espresso ink, Engraver's collection flower

Blessed and Comforted

Hi friends! Happy World Card Making Day. I'm hoping to hop into the studio later today while the boys are watching football to get my craft on! Hooray. In the meantime, I thought I'd share this card I made earlier this week inspired by the current inspiration at The Card Concept.


My card doesn't have pumpkins, but the picture totally sent my mind to my new beloved Zella Teal papers. I love the neutrals with a pop of aqua and that fun lacey banner in the photo made me think of this lace I had in the stash. I guess the style here would be freestyle collage, as I added a bunch of different papers and that beautiful rose image is from the Zella Teal Ephemera pack.


I needed a sympathy card, and this verse from the Scripture Medley 5 stamp set is a new favorite of mine. It's so uplifting to know that we are promised comfort in times of mourning. I stamped it on a patterned paper stitched circle die cut. I also used the stitched rectangle die from the new Falling Leaves Die Set for the vellum and flowery patterned paper rectangle under the sentiment circle.

Thanks so much for stopping by today! I hope you have a fabulously creative day.  If you're looking for a deal, check out these current sales going on at Verve through October 9...

40% off winter holiday stamps & dies

30% off autumn & coffee themed stamps & dies

30% off the pre-order of our October Buy-it-All Bundle
Our newest release is hitting the shop on Tuesday, and you can pre-order the October Buy it All Bundle this weekend at a 30% discount!  If you loved the images in our new Coffee Please Digi, but aren't into digis, this clear stamp set has a similar look and feel. In Autumn Leaves, the leaves are provided in outline and solid form for easy 2 step stamping or background creating. And the matching dies make fun fall cards a breeze. The cup image has a leafy design, too, and includes a steamy swirl, perfect for coffee steam or recreating a blustery autumn scene.

Plus...

And, as always, FREE US Shipping on orders over $55.


Enabler's List
Stamps: Scripture Medley 5 (Verve Stamps)
Paper: Zella Teal (Prima), white, black, vellum
Ink: black
Accessories: Falling Leaves Die Set (A Cut ABove by VERVE), stitched circles stax (MFT), Zella Teal ephemera (Prima), 

Many Blessings

Hi friends! I'm popping in to change up the scenery with this fun little card inspired by the challenge at The Card Concept.  When I saw the photo, I immediately thought of the Rose Quartz papers from Prima I just had to have but hadn't had a chance to play with yet.


For my clean and layered card, I pulled out the paper pad and picked out the wood panel and a couple others to play with.  I've been in fall coffee lovers making  mode, and had this wreath out on my desk and decided to take it in the direction of a dreamcatcher.

I stamped the wreath from Autumn Blessings in coffee archival ink, then colored with copics, adding in a few little details and berries with a pen.  I also stamped the trio of feathers and the flower, coloring with the same markers and cutting with the coordinating Autumn Thanks Die Set. To give the wreath a little sturdiness, I layered a chipboard wreath die cut below it, then glued it around a circle die cut that was stamped with the many blessings sentiment.


I added a designer paper tag up in the corner and did some loopy twine bows.  Finished off my accents with some Nuvo drops and glued it all together.

Thanks so much for stopping by today! I hope you have a wonderful day.

Enabler's List
Stamps: Autumn Blessings (Verve Stamps)
Paper: Rose Quartz (Prima), crumb cake (SU!), white
Ink: coffee (Ranger Archival), markers (Copic), early espresso marker (SU!), antique linen (Ranger Distress)
Accessories:  Autumn Thanks Die Set (A Cut Above by VERVE), stitched circle die, Nuvo drops (Tonic), twine

Classy Little Concept

Hi friends, it's time to kick off another challenge over at The Card Concept.  I chose to make my card in the classy & elegant style, as the inspiration photo had me thinking of these pretty poppies from the Floral Notes stamp set.


I stamped the poppies in archival ink, then watercolored with Daniel Smith watercolors, adding a wash of yellow behind.  I used the coordinating die cut from the Floral Notes Die Set as a mask over my stamped image when I spattered a bit of watered down India ink all over the panel.  A teeny siding of black sets off the panel and I added the sentiment on a Stitched Pennants die cut.

I pulled inspiration from the texture in the photo, adding in the embossed lines with an embossing folder, then tied it all together with some baker's twine and accented with a button and a sprinkling of Shine Bright Sequins.


Thanks so much for stopping by today! For a little more inspiration, head on over to The Card Concept to see what the other fabulous designers are sharing today. Then grab some stamps and join in the fun  Sadly, this will be my last post as part of The Card Concept design team. The challenge is taking a break for the summer and I have decided not to return in the fall, due to those two crazy adorable boys of mine stealing both my heart and my time. {grin} I have truly loved being a part of this challenge, and will miss this wonderful team.

Enabler's List
Stamps: Floral Notes (Verve Stamps)
Paper: watercolor paper, black
Ink: archival black (Ranger), watercolors (Daniel Smith), India ink (Speedball)
Accessories: Stitched Pennants Die Set, Floral Notes Die Set (A Cut Above by VERVE), Shine Bright Sequin Mix (Verve Stamps), baker's twine, button, stripes embossing folder (Cuttlebug)

Spread Your Wings

Hi friends! Another fabulous inspiration challenge kicks off over on The Card Concept Blog today. I had a lot of fun with the splash of hot pink for my mixed media take on the challenge.


I made the background with clear gesso, india ink and watercolors.  If you're on Facebook, I made a short little informal video recreating the process on my Poetic Artistry page this weekend.  The stamps are from a Finnabair stamp set.  I watercolored the butterfly and fussy cut around it, adding a few white pencil accents and some rhinestone flourishes in place of the antennae.


The sentiment is stamped directly on the card base and I was done.

Thanks so much for stopping by today. Be sure to head on over to The Card Concept to see what the other designers are sharing today.  Then we'd love for you to play along with us!

Enabler's List
Stamps: Don't Forget To Fly (Prima Marketing Finnabair)
Paper: white
Ink: black archival (Ranger), india ink, watercolors (Daniel Smith), white pencil (Stabilo)
Accessories: clear gesso (Prima), rhinestone flourish


Liberty and Poppies

Hi friends! There's a new inspiration challenge at The Card Concept this morning.  I loved those ampersands in the inspiration graphic, which inspired my paper selection.  The gold and pink with a lot of neutral pulled me in, and pretty soon I had this fun little freestyle collage card.


I loved the text on this paper and the day I made this card I had made a little donation outside a store to VFW and received a sweet little Buddy Poppy. The liberty on the paper brought that poppy to mind and so I set out to make a fun birthday card with the Poppy Birthday set. I cut the flowers with the Build a Poppy Die Set , making several of each size, then used my MISTI to line up the stamping on each flower.  I layered them together, then cut some leaves from some rose gold cardstock. I added a bit of accent with a blushing bride marker on the poppies, then added a bit of gold foil to the centers.


Next I used a glue pen to color the & symbol and also to highlight some of the brick cracks in the background paper and foiled them as well.  I stamped the happy birthday sentiment directly on this paper, then embossed in gold.  I finished off with some loops of twine and a bunch of scattered sparkly gold enamel dots.

Thanks so much for stopping by today! I hope I've inspired and you're ready to go join in the fun over at The Card Concept.  Hop on over there to see what the other designers are sharing today with this inspiration.

Enabler's List
Stamps: Poppy Birthday (Verve Stamps)
Paper: C'est La Vie (Pink Paislee), rose gold crackle (Recollections), white (Neenah)
Ink: blushing bride (SU!), onyx black (Versafine)
Accessories: Build a Poppy Die Set (A Cut Above by VERVE), natural linen thread, gold foil (Ranger), gold enamel dots, paper distresser, glue pen, MISTI


Vintage Notes Card Concept


Hi friends! It's time for another fabulous inspiration challenge over at The Card Concept.  This one was right up my alley and I knew right away I was going to use some Tim Holtz tissue paper for my mixed media creation.


I started with a manila tag coated with gesso.  I then added faded jeans, broken china and peeled paint distress oxide inks to create the background, spritzing with water and repeating until I achieved the depth I was looking for.  Next I hand trimmed around the big winged thing from the tissue paper, then layered it down with collage medium over the entire tag.  Another round of distress inks to make everything nestle in, then I added accents with a black prima oil pastel and some white gel pen accents.


The sentiment tag is also covered with a music notes section of the tissue paper and treated with the same color of distress oxide inks.  I tried to lighten it up a bit where the sentiment would go, then embossed the sentiment from Bloom & Grow in white. The sentiment didn't pop as much as I'd like, so I outlined everything with a black pen, then shaded around the panel with black oil pastel before layering it over the tag.  I added a bit of crinkled seam binding to the tag and cut a card base to match the size, adding some hints of distress all around.

Thanks so much for stopping by today! For a little more inspiration with this challenge, be sure to head on over to The Card Concept to check out what the other designers are sharing today.  We'd love to see what you create from the inspiration!

Enabler's List
Stamps: Bloom & Grow (Verve Stamps)
Paper: manila tag, cream cardstock, Melange Tissue Paper (Tim Holtz/Idea-ology)
Ink: faded jeans, broken china, pealed paint distress oxides (Ranger), Versamark, Gesso, black and white pens, Oil pastels (Prima), Gesso
Accessories: crinkled seam binding, white embossing powder, Collage medium

Thinking of Mixed Media

Hi friends! I'm popping in with a little mixed-media card I made last week.  It was actually my first attempt at a card for the current inspiration at The Card Concept.  And although I loved the individual pieces, it just didn't come together in card form the way I had imagined. So I tried again... and again before making the card I posted for the challenge. Do you ever have days like that?  I've been having them quite frequently. I find myself having a ball making mixed-media backgrounds and elements, but when it comes time to pull the stamps out and make it into a card, it's just not coming together for me.


Anyhow, I started with a piece of canvas. I picked up a few packages of canvas, gauze and muslin on the cheap at Tuesday Morning a few weeks ago and was itching to play with some of it.  I frayed the edges, then gave the canvas a good first coat of gesso, then added some yellow craft paints and some pink color burst and yellow magicals powders. On top of this, I stenciled some white sand texture paste and then added a bit more of the yellow magicals.  You can see the stenciling better in the photo below that was taken before I glued everything down.


Next I layered some rolled flowers, a skeleton leaf and some white twine together with hot glue and added it to the canvas.  I accented the flowers with some glitter glue, then dabbed some 3D matte gel randomly over the surface of the piece and sprinkled on some frantage shabby white embossing powder and heat set.

To finish the card, I stamped the thinking of you sentiment in pool party in the corner of a square, embossed card, then added a couple score lines with my scor-pal to accent the bottom.

Thanks so much for stopping by today! I hope you were inspired. :)

Enabler's List
Stamps: Joyful Blooms (Verve Stamps)
Paper: watercolor paper
Ink: pool party (SU!), peony pink (Color Burst), yellow and pink Magicals shakers (Lindys Stamp Gang), yellow paints (Distress and Adirondack)
Accessories: Heavy Gesso, White Sands Texture Paste, 3D Matte Gel (Prima), layering stencil (Tim Holtz), Frantage Shabby White Embossing powder (Stampendous), Scor-pal, Nuvo glitter drops, skeleton leaf, rolled flowers, white twine, Stars & Swirls Embossing Folder (Sizzix), paper distresser, canvas

Card Concept Thanks

Hi friends! It's time for a new challenge at The Card Concept.  I took my inspiration for this clean and layered card from the dots and the bright, happy colors.

Handmade card by Julee Tilman. www.poeticartistry.blogspot.com

I pulled out the Making a Statement set, wanting to use the scallop frame to make a little thank you card.  I then stamped the flowers and cut them with the coordinating Loopy Blooms Die Set before layering them together.  I had intended to use an umbrella sticker from a sticker sheet I had, but it wasn't quite the right size, so opted to use the leafy stickers from the same sheet.  I embossed the background in polka dots, then layered everything up to finish off.

Thanks so much for stopping by today. Be sure to hop on over to The Card Concept to see what the other designers are sharing today, then come play along with us.

Enabler's List
Stamps: Making a Statement (Verve Stamps)
Paper: Take Note (Doodlebug), watercolor paper
Ink: broken china, worn lipstick, fossilized amber distress oxides (Ranger)
Accessories: Rounded Scallop Frame Die, Loopy Blooms Die Set, Rounded Rectangle Die (A Cut Above by VERVE), leaf stickers (WRMK), dew drop, polka dot embossing folder (QuicKutz)

Looking Up Card Concept

Hi friends! A new challenge kicks off at The Card Concept today.  We're welcoming some fabulous designers to our team, so head on over to give them a shout out and see what everyone came up with for this dreamy inspiration.


I loved those white flowers and had the idea to make a mixed media background and make little white dots of paint all over it.  So I painted a background on watercolor paper using broken china, spiced marmalade and worn lipstick Distress Oxides.  I spritzed with water and dried and reapplied until I was happy with the effect, then used some collage medium to adhere a piece of printed tissue paper to the front.


I had some make-up applicators that kind of look like q-tips that I came across in my craft closet, so thought they would be perfect to add some white gesso dots with.  I taped three of the q-tips together and then dipped in gesso and pounced all over my paper.  It wasn't as distinct as I was hoping for, but I like the cloudy, dreamy look it achieved, and didn't want to cover up all that pretty color with white!


I then used the spiced marmalade and worn lipstick to make another background to stamp and emboss the flowers from  Brighter Days in white on.  The inner flower is cut with the coordinating Scalloped Flowers Die Set and the outer flower is fussy cut.  I layered these on dimensional foam, then cut some white flowers using the Sprightly Sprigs Die Set.  I scraped a little gesso on these with the q-tips and dusted with glitter before layering over a big nest of thread.


The sentiment is also from  Brighter Days and embossed in broken china onto vellum.  I roughed up the edges, then stitched to my background before layering everything together and adding to my distressed card base.

Thanks so much for stopping by today!  I hope you have a fabulously upward looking kind of day!

Enabler's List
Stamps: Brighter Days (Verve Stamps)
Paper: watercolor paper, vellum, white
Ink: broken china, spiced marmalade, worn lipstick Distress Oxide Inks (Ranger), Versamark
Accessories: Scalloped Flowers Die Set, Sprightly Sprigs Die Set (A Cut Above by VERVE), sewing machine, glitter, gesso, tissue paper (Ideaology), thread