Powered by Blogger.
Showing posts with label Asian Inspired. Show all posts

Bending in the Wind

Hi friends! Have you had a good week so far? My introverted self is starting to recover from a whirlwind of activities this weekend. They were all fun events, but it takes so much energy to socialize! 😁 I definitely needed a day of rest yesterday!


When I sat down to stamp yesterday, I knew I needed something that didn't require any extra thinking. Coloring seemed like just the thing. So I pulled out the new Color Layering Red Panda set and started stamping the bamboo stalks, leaves and grasses on sahara sand. Once I had a good scene going, I colored with copic markers and highlighted with a clear wink of stella glitter pen. I love the sentiment, bamboo survives by bending in the wind, and stamped it in cup o' joe ink. Lately I feel like I've been doing a lot of bending in the wind. There's a certain beauty in being able to adapt to the obstacles and situations that come your way. I've been focusing more on the obstacles, and this sentiment swiveled my viewfinder to see the accomplishment of being able to stand in the wind and bend instead of break.💓


I finished this simple card with a dragonfly colored with copics and cut with the coordinating frame cuts.  To add a little sparkle, I coated with the crystal clear lacquer pen and a dusting of glitter, then popped up on dimensionals to finish things off.

Thanks so much for stopping by! I hope you have a fabulous day!

Affiliate links are used on this blog. When you order, I receive a small commission at no additional cost to you and you receive happy mail! Win, win! Thanks so much for clicking on my links to shop. 💙


CM303 Color Layering Red Panda
[ HA | SBC ]
DI570 Color Layering Red Panda Frame...
[ HA | SBC ]
AF214 Cup O' Joe Mid-Tone Shadow Ink...
[ HA | SBC ]
NK350 Crystal Clear Lacquer Pen -...
[ HA | SBC ]
ZIG - Memory System - Wink Of Stella...
[ SBC ]

Beauty and Grace

Hi friends! I'm back again with another card highlighting the beautiful September My Monthly Hero release. Today's card comes to you courtesy of the lovely Ink Painting Scene stamp set and coordinating Frame Cuts.


One think I have always wanted to learn is watercolor. I practice here and there, but never enough to really get the hang of it. These stamps inspired me to create a little scene, even doing some masking (something I rarely take the time to do) to stamp a little village nestled in the mountains.  I colored with some Jane Davenport INKredible inks and the gorgeous Cocoa Liquid Watercolor for the reddish plain. The snowy parts were done with a bit of white gesso and a white gel pen.


Next I stamped the cranes, coloring with intense black ink and a waterbrush for the greys, and a black micron pen for the black on the wings. I cut them with the coordinating Ink Painting Scene Frame Cuts.  I finished by pairing two of the sentiments embossed in white on  a black circle and then adhered everything together. Love the simple, elegant feel to it.

Thanks so much for stopping by today! I hope you have a wonderful start to your weekend. We've got flag football and a Boise State football game planned tomorrow. Football season is definitely here.

Affiliate links are used on this blog. When you order, I receive a small commission at no additional cost to you and you receive happy mail! Win, win! Thanks so much for clicking on my links to shop. 💙


CM302 Ink Painting Scene
[ HA ]
DI568 Ink Painting Scene Frame Cuts (C)
[ HA ]
AF345 Intense Black - Hero Arts
[ HA | SBC ]
PD123 Cocoa Liquid Watercolor - Hero...
[ HA | SBC ]
American Crafts - Mixed Media 2 -...
[ SBC ]
American Crafts - Mixed Media 2 -...
[ SBC ]
American Crafts - Mixed Media 2 -...
[ SBC ]
American Crafts - Mixed Media 2 -...
[ SBC ]
American Crafts - Mixed Media 2 -...
[ SBC ]
Tsukineko - VersaMark Watermark Ink...
[ SBC ]
Judikins EP2-51 Embossing Powder,...
[ AMZUS ]
Spellbinders S4-116 Nestabilities...
[ AMZUS ]
ZIG - Memory System - Wink Of Stella...
[ SBC ]
XL Watercolor Pad, 9"X12" Fold Over
[ AMZUS ]

Autumn Moon

Hi friends! Today I'm popping in with a couple cards I made with the Autumn Moon stamp set and the Patterned Lanterns Bold Prints background. These stamps took me back to my early days of stamping. I've always had a special place in my heart for Asian decor and remember making oh-so-many cards with my beloved Kanji and Asian Artistry Stampin' Up sets back in the day. I was overjoyed to see the add-on sets this month. So much beauty and serenity in these images.


For my first card, I embossed the branch from the Autumn Moon set in gold on watercolor paper and then colored with orange and cocoa liquid watercolor inks. I also used some of the colors from the Daniel Smith dot card included in the September My Monthly Hero kit. Have you ordered your kit yet? It really has been one of the funnest sets I've used in quite a while! I'm definitely a #TeamAutumn girl, how about you? 😊 Oh, and if you're already a kit subscriber, then you have until tonight (9/6) to order any of the add-ons to be included when your kit ships for no additional shipping charge. September kits start shipping on Friday, September 7. Woohoo! There are definitely some must haves in this release!


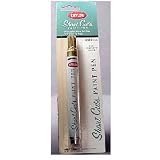
Anyhow, back to the card. I pulled out a gold Krylon paint pen that's as old as those Kanji cards from way back when. It gave me quite a few fits, so I didn't quite get as clean of a brushed gold look as I was going for, but sometimes you just have to deal with the hand you've been dealt! And then order a new pen!  Haha!

I matted this panel in gold and then again with a panel embossed with the Patterned Lanterns Bold Prints. This pattern looks just like the wallpaper at a favorite restaurant near where we lived many moons ago. I pulled out some red cardstock and then embossed the background in gold embossing powder.  It's a 6 x 6 background, so I was able to use the same impression for both this card and the card below.  I added this panel to a watercolor panel also brushed in gold paint and embossed the fall is in the air sentiment in the bottom corner.  I splattered some of my excess paints from watercoloring all around and then accented with a bit of gold cording that I tied to a coin embellishment.


For my next card, I loved the look of the cherry cobbler with the gold embossing, so embossed the lantern, the octagon and the two flowers on the same cardstock and cut with the coordinating Autumn Moon Frame Cuts.  The octagon doesn't have a frame cut, but it was super simple to trim! 😉 I very carefully pierced a hole in the lantern top and looped some gold thread through the hole to hang the lantern from. I cut down the background as an accent panel and matted in shiny gold, then hung the lantern from the teeniest tiniest micro brad you ever did see!


To finish, I embossed the sentiment in gold, then cut with stitched oval dies and matted in shiny gold. Classy and elegant, if I do say so myself! 😀

Thanks so much for stopping by! I hope you have a bright, beautiful day!

Affiliate links are used on this blog. When you order, I receive a small commission at no additional cost to you and you receive happy mail! Win, win! Thanks so much for clicking on my links to shop. 💙


Autumn Moon - Hero Arts
[ HA ]
Autumn Moon Frame Cuts
[ HA ]
September 2018 My Monthly Hero Main...
[ HA ]
Orange Liquid Watercolor - Hero Arts
[ HA ]
PD123 Cocoa Liquid Watercolor - Hero...
[ HA | SBC ]
PW100 Gold Embossing Powder - Hero Arts
[ HA | SBC ]
CottageCutz CCB-010 Basics Dies (8...
[ AMZUS ]
Krylon KSCP901 Short Cuts Paint Pen, ...
[ AMZUS ]
XL Watercolor Pad, 9"X12" Fold Over
[ AMZUS ]
Tsukineko - VersaMark Watermark Ink...
[ SBC ]
MT100 Original MISTI Laser Etched...
[ HA | SBC ]

Razzleberry Dream

Happy Tuesday! I've been sick and spent most of my time on the couch the last couple days, but the arrival of my SU! order lured me in to my studio for a few minutes. Unfortunately, now I think it's back to the couch for me.


This was a quick little SUO (Stampin' Up! Only) card. I like how it turned out, but I think if I were to make it again I might emboss over the top of the geisha with Irridescent Ice to add a little pizazz. I started by stamping the grunge background from Extreme Elements in Pale Plum, then stamping over the top of that with the geisha from Dream Gardens in Rich Razzleberry. You can't really see the background stamping in my photo, but I think it has a cool effect. Here's a a close-up that shows the background stamping a little better.

I used the Notch Punch for the corners, which I just realized must be retired (how dare they?) because I can't find it in the catty. For the sentiment, I stamped another of the backgrounds from Extreme Elements in Pale Plum and then the dream stamp in the center. This panel is punched out with the 1 3/8" circle punch and then matted with the scallop circle punch. The background paper is from the Razzleberry Lemonade DSP and is embossed with the Finial Press embossing folder. I finished off with some Rich Razzleberry Polka-Dot grosgrain ribbon and three brads from the Styled Vanilla Hodgepodge Hardware.

What's in It?
Stamps: Dream Gardens, Extreme Elements (SU!)
Paper: Vanilla, Rich Razzleberry, Razzleberry Lemonade (SU!)
Ink: Pale Plum, Rich Razzleberry (SU!)
Accessories: Finial Press embossing folder, 1-3/8" and scallop circle punches, Rich Razzleberry Polka-Dot grosgrain ribbon, Styled Vanilla Hodgepodge Hardware, Notch Corner Punch [retired] (SU!)

MTVD02 Inspiration Challenge

Today I'm going to share with you the card I made for Amber's Meet The Verve Divas Challenge in the Verve Forum this week. You still have until Wednesday night to get your entries in for a chance to win $15 in Verve Bucks, so be sure you give it a go. You can't win if you don't try. ;) The inspiration photo is just yummy and has been inspiring some really cool and unique cards.

I took my inspiration from the colors and the diamond shapes in the plate. I really loved how the orange played against the blue, so I chose Pumpkin Pie, Night of Navy and Soft Sky for my color combination, and Asian Flair as my stamp set.

To begin, I started stamping the open square from Asian flair in Night of Navy across the paper and then I filled in the cracks above and below with rows of the closed square stamp in Pumpkin Pie. Next I stamped the butterfly in the three open squares and colored with Copic markers. I used a copic marker to color in the border on the pumpkin squares and then used some eclipse tape and a 7/8" square punch to mask off the squares, so I could stamp the viney flower inside the squares. Next I stamped the sentiment in Night of Navy, highlighted the canvas with an orange Copic marker and then masked off above and below the sentiment, so I could color the strip with the BG10 (match for Soft Sky) Copic marker. I added some piercings across the panel and then used my Swiss Dots cuttlebug folder to emboss just one row of dots across the bottom. I accented it with just a hint of the BG10 ink and then added Pumpkin Pie photo corner punches, which I stamped with the closed square stamp in Pumpkin Pie for some interest. This is glued to a Night of Navy panel with Pumpkin Pie Grosgrain tied in a knotted bow around the end. I finished off with a little orange bling and some Stardust Stickles, then matted everything on a Soft Sky card base.

Mojo Monday Week #43

Hey everyone! Are you ready to get your mojo on? This week I've got a fun sketch for you, and I've even (shockingly enough) already made my sample card! :)

If you're new to mojo, I'd love for you to play along. Just make a card using the sketch as inspiration and then leave a comment on this post with a link to a photo of your creation. There is no time limit - you can play any week at any time, but to be included in the slideshow next Monday, I need your link by Sunday at 8 PM Mountain time (6 PM ET). If you happen to upload to SCS, please use keyword Mojo43 so we can see everyone's mojoliciousness all in one happy place.

My sample card today is a sneak preview of two of the new Verve sets releasing on Wednesday... Asian Flair and Here For You. I started by cutting and embossing an oval with Nestabilities Classic dies. I also cut a basic grey scalloped oval mat at the same time. Then I pulled out one of the grasses stamps from Floral Whimsy and stamped in Basic Gray as a body for my bamboo stalk. I then stamped the bamboo leaves on each blade in Basic Gray and set aside. Next I made a background for my square using the open square frame and one of the circle images from Asian Flair. I matted this square on black and set aside. I cut a strip of Basic Gray, used a corner rounder to make a scallop edge and then stamped the Asian circle image in each scallop. I tied a black grosgrain knotted bow and then added some dots above the ribbon for interest.

For the bottom panel I took a piece of Soft Sky and then randomly stamped the grass blade again and the bamboo leaves across the bottom (leaving room for the sentiment) in Soft Sky ink. I finished off with the "I'm here if you need me" sentiment from the new Here For You set and added three black brads for accent.

Be sure to check out the Verve Blog to see other sneak previews and enter for your chance to win these new sets.

Be sure to checkout the 98 mojolicious entries from last week in the slideshow below!


NOTE: If you get a message that says no photos found, please hit the refresh button on your browser or the F5 function key on your keyboard, and hopefully it will reload with the pictures!

Asian Flair Preview

Hi everyone! Today is the start of the sneak previews on the Verve Blog for our June 25 release. Be sure to head over there to see a few projects from the design team and enter for your chance to win this set.

My sample card uses five stamps from the new set. Most of you who've been reading my blog for a while know that I totally love Asian art. There's a simplistic beauty in most of it that really inspires me. The images in this set are all just under an inch, making it easy to mix and match for beautiful backgrounds, as well as simple one layer cards. I chose to make a background for this card, so pulled out the solid and outlined funky square images and stamped them alternating in Old Olive and Purely Pomegranate ink. I just kind of eyeballed it. For me the easiest way to line things up is to stamp the first square, then line up the next stamp of the same kind on the diagonal corner, repeating across the page for a checkerboard pattern. Then I simply went in and filled in the holes in the checkerboard with the solid square in Purely Pomegranate. I love the really neat background it makes.

Next I stamped, the solid square frame three times in Old Olive. Since I'm not always the straightest of stampers and I envisioned lining these stamps up as parts of trios, I designed the square frames to fit a 7/8" square punch so they could be easily punched out and lined up. Then I stamped the bamboo leaves inside the squares and matted with 1" black squares. Next I pulled out some We R Memory Keepers paper from the White Out Hoopla collection, wrapped a thin grosgrain ribbon around it, matted in black and attached to a white card base. I finished off with the sentiment in black and three pearl dew drops below it for accent.

Artful OCC

Happy Saturday! This morning I woke up all giddy when I remembered that the first Our Creative Corner Challenge was being posted. Woohoo! I couldn't wait to stamp! This week's challenge was a sketch by Cindy Haffner. I paired the sketch with the color inspiration #11 from kwernerdesign and got to stamping! After I finished, I realized the real challenge was to use mostly white on your card...oops!

My goal for the card was all SU!, but I came just shy of that. Without thinking about it, I used Copics for coloring and to dye the Vanilla taffeta ribbon. And I used dew drops from Robin's Nest. Other than that, everything is SU!

I started by stamping the flower sprig from Artfully Asian and then coloring with Copics. Next I overstamped the whole panel with Linen background in So Saffron and then sponged the edges. I stamped the Paisley background on a piece of Old Olive and a piece of Rose Red in the same color ink as the cardstock. I used the Rose Red piece for my matting and the Old Olive piece for the second rectangle panel and a photo corner punch accent on the top. For the background of the card, I used the Tres Chic background in So Saffron and then realized I didn't have any Going Gray cardstock. So I stamped Linen in Going Gray on white and then brayered over the panel with more Going Gray ink. I really like the effect. Next I went for the sentiment, and pulled out the Circle of Friendship stamp set. I used two of the circle stamps, using a 1/2", 1", 1 1/4" and 1 3/8" punch for all the layers. I finished off with some piercing accents, a little Crystal Effects/Dazzling Diamonds mixture on the flowers and some dew drops along the bottom edge of ribbon.

A Sketchy Set

Hi everyone! Hope y'all had a Happy Christmas and are enjoying your new goodies. I plan to spend some time today playing with my new Copic markers! Yep, hubby surprised me with a set of 36 Copics to play with. Hooray! Now I just need to learn how to color like a pro. I also got a ribbon iron, some books I've been wanting to read, enough iTunes dollars to feed my audiophile addiction for a few months and hubby and I got a combo present of a HD DVD player for our XBox 360 and a new receiver so we can see all our favorite movies in their crystal clear high def surround sound glory. I know, we're a couple of geeks, but at least we're geeky together! LOL :)

I thought I'd show you the card set I made my Grandma for Christmas. I had a whopping 45 minutes to complete this before we had to leave, so they're rather simple, but I like the way they turned out. Sorry the pictures are so dark, I was in quite a hurry to take them before I wrapped them up. The sketch is Jen's Sketch for You to Try from last Saturday.

I started by stamping the flower from Artfully Asian on some watercolor paper I got from Archiver's with a coupon on my last trip. I then lightly traced all the lines with a light gray Tombow marker and colored with Eggplant Envy and Certainly Celery reinkers and an aquapainter. I matted the image on Elegant Eggplant. I then stamped the circle frame from the rubber version of Wonderful Wishes in Pale Plum on the watercolor paper and then stamped the sentiment from the clear set Wonderful Wishes Remixed inside the frame. I punched out with a 1 1/4" circle punch and matted on a 1 3/8" Elegant Eggplant circle punch. The designer paper was from the Enchante paper pack, which I ran through the Cuttlebug with the Textile embossing folder. I then matted on Elegant Eggplant and tied a purple May Arts ribbon around the panel. I made a set of 4, using a coordinating pattern of paper for 2 of them. I think Grandma liked them, so that's what's really important.

Oh, and if you haven't already, be sure to check out Laurie's blog, Charmaine's blog, Bethany's blog and Shannan's blog for some Verve candy!

Asian Flair

Well, I still had another cast off image from my mojo sample card on Thursday on my desk, so I made another card with the same supplies. I had thrown this image aside because my sponge was all chewed up (dangers of having a curious cat) and my sponging got a little streaky. Then after I chose the grey colors to sponge Thursday's card, I decided I could cover up the streakiness with Basic Gray ink and salvage my image.

I'm really pleased with how this card turned out. There's just something really satisfying to me about making Asian influenced cards. It's probably my favorite style, although I haven't had a chance to make very many cards like this lately.

The images are from the From the Garden set by Fancy Pants Designs. I colored it with Prismacolor Pencils and a Prismacolor colorless blender pen and then sponged around the edges in Summer Sun, then Cranberry Crisp, then Basic Gray. The flowers and blossoms are all painted with a mixture of Diamond Glaze and Crystal ultrafine glitter. I then used my Mcgill punch to punch out the symbol, which means Good Luck and then I used a Krylon Gold Leafing pen around the punch, the outer edges of the panel and it's larger basic black mat. The Basic Gray background is made with another stamp from the Fancy Pants set and the red and gold strip is a gorgeous silk ribbon that Dana sent me a while back. I had a hard time photographing this one. Wish you could all see it up close and personal, but I like it too much to send it out just yet. :)

Hope you all have a great weekend! I'm hoping to get a jump on some holiday projects.