Powered by Blogger.

Farmhouse and Butterflies


Hi friends! Happy Friday! I hope you're having a great start to your weekend. There are lots of good sales in the retail world, so if you're shopping I hope you shop victoriously. {grin}

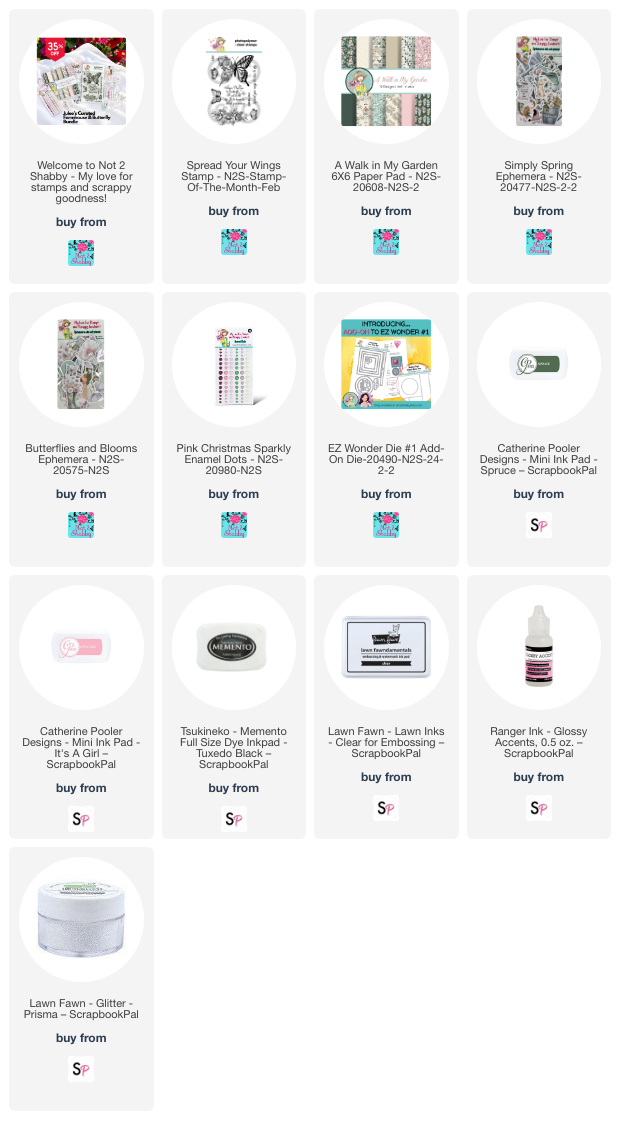
Speaking of deals, Not 2 Shabby has some fabulous Black Friday bundles up for grabs at a fantastic price. I  had the privilege of curating one of the bundles with a few of my favorite products and you can pick it up at a 35% discount right now! Some bundles are up to 50% off, so be sure to check them all out at the link above. Plus orders of $60 or more will get a free gift!


I think this bundle of beautiful stamps, paper, ephemera, and enamel dots would make the perfect gift for a crafty friend, but also is very versatile in the type of cards you can make with it.  I made three cards to share today for the launch of the sale.


The first card uses the big butterfly from the Spread Your Wings stamp set. I colored the buttefly with Copic markers and then cut with my Scan 'n Cut machine, accenting with some glossy glaze and glitter. I love that the A Walk in My Garden paper pad has both beautiful prints and several coordinating solid papers making it super easy to craft with. Here I used one of the peach solid papers and stamped the flower stamp in the background with a coordinating ink color to make my own patterned paper. I added a sentiment banner cut with the EZ Wonder Dies #1 Add Ons, then finished with a strip of designer paper and some sparkling enamel dots.


One of the beautiful things about Not 2 Shabby products is that they all mix and match so well. Neither of the ephemera packs that I selected for the bundle were specifically designed to coordinate with this paper pack, but they do so beautifully! (For even more options, you can extend your bundle by ordering the A Walk in My Garden Ephemera that was designed to go with this paper collection.) 

I started by embossing the sentiment in white onto one of the green solids in the paper pack. Next I cut it out using one of the square dies from the EZ Wonder Die #1 Add Ons. I then collaged different pieces from the two ephemera packs included in the bundle to make my little scene. I just love those butterflies, don't you? 


For my third card, I picked out a few of the scraps from my previous two cards and started playing. I didn't want to cut into a new piece of paper and didn't have enough for the green mat, so I swiped some Cathering Pooler spruce ink onto white cardstock to make the mat. Then I used the ink left on my craft sheet from swiping to create the smooshed background on distress watercolor cardstock.  

The hugs die is from the EZ Wonder Die #1 Add Ons and I stamped just the sending portion from one of the sentiments and cut it out to complete the sentiment.  I finished with a couple pieces of ephemera and some more of those fabulous sparkling enamel dots.

Thanks so much for stopping by today! I hope you found a little inspiration here. Have a wonderful day!

- Julee

Snow Cute Card and Easy Pocket Duo


Hi crafty friends! Today I've got a fun little card and gift card pocket duo to share with you featuring the Snowy Pastels paper and ephemera from this month's Paper Pad Club.

If you've been following my posts lately you might have noticed I'm currently obsessed with embossing folders again. LOL! I have always loved the way they look, but they keep getting moved around my stamp room as I make room for new things. Out of sight, out of mind, I guess. In my current creative chaos, the embossing folders moved over by the die cutting machine and it's like I've got a whole new stash of goodies to play with! I guess that's the pay off of 30 years of collecting craft supplies!


For this card I dumped out my Snowy Pastel Ephemera bits and pulled together a few I wanted to use.  Isn't this sweet girl critter so sweet? I cut a little slit in the coffee mug ephemera to slip her hand under the handle, then tucked a little flower behind her. For the background, I pulled out the Perfectly Plaid stencil that is part of the Enjoy this Life bundle and used distress sprays and spritzes in salvaged patina and chipped sapphire to create the background. I love how the sprays give a dissipated look to the color. Snow fun!

I finished off the card with a white scallop mat and a strip of Snowy Pastel paper. I added a little chipboard snowflake, embellished with a flatback pearl, and then added to the top folding A2 card base that I had embossed with a snowflake embossing folder.


This time of year my cards often get a little gift accompaniment. For this coordinating gift card pocket, I chose a similar but smaller ephemera piece. The gift card pocket is so super simple. It's a 3" x 6" piece of patterned paper, folded in half and glued on the two sides. I punched a half circle as a little thumb notch, then embellished with more patterned paper and some ribbon and jingle bells. Super fun and quick.

Thanks so much for stopping by today! I hope you have a fabulous day!


Birthday Wishes and a Hop

Hello sweet friends! Today I'm excited to be taking part in an Instagram Hop with a bunch of other crafty friends to celebrate Creative Worship Stamps (formerly Sweet 'n Sassy Stamps) 17th year in business! Wow! Korin and I started our stamp companies only a few months apart, so it's hard to believe it's already been that long.


There's an awesome prize up for grabs along the hop, so you'll want to head on over to Instagram to start the hop. Their Black Friday Sale kicks off today as well, so it's a great time to grab any goodies you've had your eye on. It's been such a sad time lately in the stamp industry seeing so many small stamp companies close, if you are able, I urge you to support the amazing companies that are still around like Creative Worship Stamps.


A while after I closed Verve, I had the privilege to work closely with Korin behind the scenes at Sweet and Sassy Stamps for a few years. I also illustrated a line of stamps under the J Tilman Designs label. So for my card today I thought I would combine some of the stamps I illustrated with the Texture Tiles stamps that drew me in to the company way back when.


I started by stamping out the flowers and leaves from Forever Loved. I colored them up with Copic markers (R01, R20, R22, YG23, YG63, YG67), then cut with the coordinating Forever Loved Dies.

The background started with some neutral graph paper. I blended tattered rose distress oxide and over coffee Catherine Poolker inks, then did some smooshing with the same colors. Next I went in to add some texture with the Script and splatters stamp from the Texture Tiles 1 stamp set.  

For the sentiment, I created a banner with the opposite side of the same paper, embossing the sentiment from Joyful Day in brown, and then stamping over it with the splatter texture stamp.I then tore another strip of that paper and sponged with Over Coffee ink and then stamped with the crackle texture from Texture Tiles 6.  

I found a scrap of muslin and a mini doily in my stash, so decided to layer them up on the background, and then I pulled out some sprays to do some splattering.  I used Saltwater Taffy and Vintage Photo Distress Spritz as well as some watered down bleed-proof ink.  Once the background was how I wanted it, I layered on the flowers and sentiment, then finished off with a seam binding bow that I inked up here and there with tattered rose distress oxide and then painted with a light coating of fairy fluff magicals.

Thanks so much for stopping by today! I hope you have a fabulous day and enjoy the hop!

Quick Christmas Card with EZ Wonder Dies


Hi friends! Today I'm popping in to share a quick little card featuring the new Rejoice paper collection and stamp set, as well as the EZ Wonder Dies from Not 2 Shabby.

I cut my EZ Wonder pieces from a sheet of Rejoice paper and a sheet of gold foil cardstock.  I wanted the square die cut to fit tilted inside of the circle cut out, so I grabbed the EZ Wonder #1 Add On and used the largest circle die centered over the opening in the paper to cut a thin circle frame. I set the frame aside for another card and then got to work on the card.


The true story sentiment is from the Rejoice stamp set and is embossed in gold onto a 2" square of white cardstock.  I added the two gold banners staggered underneath the sentiment, then popped the panel and banners up on dimensional foam tape.  

The branch image and the angel are cut aparts from one of the pages in the Rejoice paper pack. I fussy cut them with scissors and then added them to either side of my card. The focal panel and images are glued to a white panel embossed with a snowflake embossing folder and then added to a top folding A2 card base.

If you'd like to watch me make this card I have a very short video you can watch on my YouTube channel.


Thanks so much for stopping by today! I hope you have a fabulous day!


Christmas Joy and a Video


Hi friends! Happy Saturday! Hope your weekend is off to a great start. I'm popping in today to share a card and video I made with some new goodies from Not 2 Shabby. I always love to make faith-based cards for Christmas and as soon as I saw peeks of the new Rejoice stamp set and paper pad I had to have them!


These two products along with a few other fun holiday goodies are part of the Better than Black Friday release. And you guessed it... it coincides with a sale, but you need to hurry since it's only through November 17!  I'll add the coupon code details at the bottom of this post.

Lately I've been putting some more planning into my crafting time, and I'm hoping to start creating more videos in the coming year. So today I'm testing out a real-time video. I am not the fastest crafter in the universe, so it's a relaxed pace "craft with me" style of video. Let me know what type of videos you prefer - relaxed pace or heavily edited and sped up. You can view the video below or on my YouTube channel.


The technique I use in the video is a masked off watercolor background. I used some liquid watercolors and some Lindy's magicals (I believe those specific colors are now retired), but you can use any kind of water based medium or ink for this effect. I love the way a vivid watercolor background looks with a stark white embossed image or stamp, so this set was perfect for that.


I also used the EZ Wonder Die #1 and the EZ Wonder Add On #1 to create my card, dressing things up with some fun dry embossing folders from my stash. Jamie just opened up pre-orders for another round of the EZ Wonder dies, so if you've been waiting, it's a great time to claim one.

Thanks so much for stopping by today! I hope you have a fabulous rest of the weekend. As promised here are those coupon codes.

Not 2 Shabby Shop Black Friday SALE Info:
 • 10% OFF with Code: BETTER10 
• No minimum, but if you spend $60 (after discounts) receive the Free “Purrs & Cocoa” Stamp Set

• 15% OFF with Code: BETTER15 Spend $75 (after discounts) 
Unlock 15% OFF + Free US Shipping + Free "Purrs & Cocoa" Stamp Set

• 20% OFF with Code: BETTER20
Spend $150 or more (after discounts) Unlock 20% OFF + Free US Shipping + Free “Purrs & Cocoa” 
Stamp Set

Ready to treat yourself? Just grab a coupon code, fill your cart, and let the savings begin. 🎨
Sale Ends 11/17 - Shop Early for the Best Selection!

Snow Place Like Home


Hi friends! Today  I'm popping in with a snowy little card I created with the Snowy Pastels paper pad and a stamp from one of the sets in the Not 2 Shabby November Box of the Month. I've been having so much fun with this month's goodies!

Lately I've been on a quest to find a white paper to use with my ephemera that isn't quite such a stark contrast in white. Since I have around 30 years of craft room supplies already, I started by looking through some of the papers in my way down deep file. {grin} I stumbled upon a pad of mixed media paper in a spiral bound notebook that seems to be a fabulous match. I tested it out on a card I posted earlier this month and I loved how the paper and ephemera played together. Today I was testing out how well the paper could stand up to wet media and I was pleasantly surprised.


The Smooshing
I really wanted the snow place like home stamp to take center stage so I created a smooshed background on mixed media paper. To do this, I smooshed a Juniper Mist ink pad onto my glass mat, then spritzed with water. I then took some acetate packaging and dipped it in the ink, then transferred to my paper. I dried with a heat tool, and then repeat the process, building up the layers. Once it was how I liked it, I splattered some of the excess ink onto the paper with a paint brush, then did some more splattering with white bleed proof ink. I then embossed the stamp onto the background and tore around the edges of the paper to create my focal piece. Tearing towards you will give that nice white border around your piece.

The Pouncing
The larger background started out as a 3.75 x 5.5" panel of patterned paper from the Snowy Pastels Paper Pack. I distressed the edges with a paper distresser, then pulled out a round foam brush and pounced all around the edges for a a snowy effect. I was so tickled that my smooshed background is almost a perfect match for the paper I chose from the pack, and I love how it went together.  I finished the card off with some snowflake die cuts in various sizes and a little foam tape under my focal panel for dimension.


Thanks so much for stopping by today! I hope you have a fantastic day.

November Not 2 Shabby Hop and Video


Hi friends! It's the 10th of the month and that means it's time to hop along with the Not 2 Shabby Design Team as we share inspiration with the November subscription products. As per usual I have a video for today's hop. I'm featuring products from the November Box of the Month and creating a mixed media background on patterned paper.  You can watch it here on the blog or on my YouTube channel: https://youtu.be/L_jQ3vaoaJ0


I started out by creating three similar backgrounds using papers from the Frosted Bliss Paper Pack. I like to do multiples when there's going to be dry time involved.   started by adding gesso in layers to the centers of my card panels. Once that was dry, I pulled out some opaque crackle texture paste and slathered it over the dried gesso. You want to add it pretty thickly in order to get the best crackle effect.


Once it was dry, I went in and smooshed and splattered ink so it would highlight the cracks and crevices.  For the first card I used the adorable penguin stamp and colored him up with Zig clean color real brush markers, then cut him out with my scan 'n cut machine.

I tore some papers to house my sentiment, stamped from the same sentiment and cut with the the Emily's Alphabet/Number Die Set. A little double sided adhesive and some seambinding helped me make a little ruffle across the panel.  I then glued down some lace and my sentiment panel. The penguin image is popped up on foam tape, and I finished off with a seam binding bow and a ton of distressed edges.


For this next card I added a cluster of ephemera from the Frosted Bliss Ephemera pack to create a lovely scene with the crackled panel as the backdrop.  The sentiment is embossed in white onto navy cardstock, then cut with the same die as above.  I painted over all of the flowers and little details with a mixture of water and Fairy Fluff magicals for a ton of sparkle.


For the third background, I layered a brick die cut from my stash over the gesso, then die cut a tag from patterned paper and chose some more ephemera from the pack.  The sentiment is from another stamp set in the box of the month, stamped in Stone Blue.  I finished with a chipboard snowflake and some sparkling enamel dots. 


Thanks so much for stopping by today! I hope you have a fabulously creative day. Be sure to head over to YouTube to check out everyone's fabulous creations with this month's goodies!


Smore Grateful


Hi friends! Today some crafty friends and I are participating in an Inspiration Hop over on Instagram. We've all created with the theme of gratitude/thanks. When I saw the theme, I just knew I wanted to use this adorable stamp S'more Fun set from Pink & Main. I purchased it last year and hadn't had a chance to ue it, so I busted out my Copic markers and got to coloring them up.


The papers I chose to go with my fall palette of colors are from the 49 and Market Color Swatch Peach.  I used one of my all time favorite embossing folders from years gone by on the large panel, then brushed a rusty hinge distress ink pad direct to paper to highlight the embossed design.  I added some dark brown mats to my layers, sponging each paper with rusty hinge ink and finished with the sentiment embossed onto the rectangle paper.

While I had my Copics and fall supplies out I grabbed another set that needed to see some ink and got to working on a tag. These adorable critters are from Crafty Stamp Co's Fall Pumpkin Patch Critters stamp set. I colored them up and then cut with my Brother Scan 'n Cut.  


I did a similar embossing technique on the tag as I did on the card, but I started with a smooshed mixed media tag instead of patterned paper and used scorched timber ink. I cut the tag down to the size I wanted and rounded the corners.  I then blended the edges with scorched timber and splattered on some Gilded foundry wax and heat set for the metallic accents. I pulled out some prima leaves from years gone by, then embossed the sentiment from a retired Journals 4 Life stamp set and die cut to add onto my tag. 

Thanks so much for stopping by today! I hope you have a fantastic day!

Let's Get Cozy


Hi friends! I'm back with another caffeinated creation for the Fall/Winter Coffee Lovers Blog Hop.  I'm just loving the fun colors and images in this month's Not 2 Shabby Box of the Month. Today I'm playing with the Snowy Pastels Paper Pack and Snowy Pastels Ephemera.


I wanted to make a cozy little scene with this cocoa loving girl. So pulled together the rolling card and some pillow and star ephemera to craft it all together.  The let's get cozy sentiment from the November Box of the Month seemed to go perfectly, so I embossed it onto a die cut from Emily's Alphabet and then blended with blue inks.  I added some papers and a scalloped rectangle mat behind everything, then finished off with a chipboard snowflake and some enamel dots for accent.  The light hit the rose gold pinstripe stickers weird in the photograph. They are a much softer pink in real life.

Thanks so much for stopping by today! I hope you have a fabulously creative day!

Cocoa Love Fall Winter Coffee Lovers Blog Hop


Hi friends! It's the start of the Fall/Winter Coffee Lovers Blog Hop and I'm popping in to share my first card for the link up. It's the 10th anniversary of the hop and I can still remember the very first one! So much caffeinated fun through the years! 


It's also release day at Not 2 Shabby, and there are some wonderful cocoa themed goodies in this month's release. My card today features papers, ephemera and a stamped sentiment from the November Box of the Month. Although the box of the month is currently sold out, the papers and ephemera are available separately and you'll definitely want to snatch these beauties up!

This ephemera piece from the Frosted Bliss Ephemera pack just called out my name, so I picked a pattern from the Frosted Bliss Paper Pack to coordinate and then got to work.  I've been in the mood for distressing lately, so I distressed the edges of the paper I chose. I then grabbed the Juniper Mist Catehrine Pooler Ink and did a little smooshing on some mixed media paper. I tore the bottom edge to layer behind her, then started collaging pieces of ephemera around her.  


The sentiment is from one of the stamp sets in the box of the month and I embossed it in white on mixed media paper, then cut with a die from Emily's Alphabet Die Set.  I just love this shape and you'll be seeing it often. After embossing, I blended with Juniper Mist and Dress Blues ink, then wiped off the resist. (Tip: some blues have a lot of red in them and tend to add a pink tint to the white. If this happens, once it's dry, I just go over the sentiment with a clear alcohol ink blender to knock back the pink.)

Before I glued things down I tied some white seam binding around the main panel, then painted the ribbon and many of the ephemera elements with some Lindy's Magicals Fairy Fluff.

Thanks so much for stopping by today! I hope you have a fantastic start to your day.  Be sure to check out the Coffee Lovers Blog Hop as there are tons of super fabulous sponsors (including Not 2 Shabby) who have generously donated a bunch of prizes!